
Grab a bargain on LED tail lights at ![]()
Get a REDARC Towpro at the best price on ![]()
Wiring and connectors
All trailers require basic 7-core wiring for the tail light clusters and electric brakes. See this wiring diagram for the correct plug and socket wiring for both round and flat connectors.
The most popular option today is a 7-pin flat connector, but you can also use a 12-pin flat
, which provides 5 additional heavy-duty pins and is compatible with the 7-pin flat. Large
and standard
7-pin round plugs/sockets are also available. These are less commonly used, but can be recessed or flush-mounted on the tow vehicle which may be an advantage on some vehicles.
Lights
LEDs provide the best option for the tail-light clusters. They are long lasting, water and dust proof and very resistant to vibration compared to standard globes. I recommend you install reversing lights too, as they make life much easier when reversing into campsites at night. I used combination blinker/brake/tail/reversing lights and an LED number plate light from
Bright Light Auto Parts, which have proven reasonably durable and have a 5-year warranty. Alternatively, there are higher quality clusters available from Narva and Hella.
Unless your trailer is very short, you'll also need clearance lights and reflectors
on the side in order to comply with ADR listing requirements.
Brake Control
Most camper-trailers will require electric brakes to be fitted. These must be controlled by an in-vehicle electric brake controller.
There is a wide range of brake controllers available depending on installation requirements and budget. Relatively cheap (but good quality) units are produced by Tekonsha. The next step up is a remote head controller from Hayman-Reese
, but the best option is a premium Australian-made
Tow-Pro from Redarc. The Tow Pro range offer remote mounting of the main unit, with a small (and simple to operate) rotary button being the only visible part of the installation.
Upgrade to Lithium Deep Cycle ![]()
AGM and Gel deep cycle batteries
If you decide to go with a lead-acid battery, make sure it's a deep cycle, not a standard starting battery. Although there are flooded deep cycle batteries available, they emit hydrogen gas when charging so they should not be installed into sealed compartments. They are a good choice for under bonnet applications, but for a camper, you're better off with a Gel or
AGM (Absorbed Glass Mat) deep cycle battery as they cope better with vibrations. Although they are designed to withstand greater cycling than standard batteries, they are still damaged by complete discharge, so should be maintained by a 'smart' charger for as much of the time as possible.
All deep cycle batteries are typically rated in Amp Hours (Ah), rather than in CCA. The Ah rating is an indication of how long the battery will provide power at a given load. eg: 100Ah roughly means it can provide 100 amps for 1 hour or 1 amp for 100 hours. Weight is also an important guide to the quality of AGM and gel batteries, with heavier batteries usually being higher quality. I've gone with a premium 40kg 135Ah gel battery, , which (just) fits into a standard N70-size battery tray. This capacity is sufficient (even with no charging) to provide power to run my Trailblaza fridge for 3-4 days. Larger and smaller batteries are available, depending on your space availability and power requirements. Don't go for a battery too large though, as failing to fully charge a battery can be as damaging as over-discharging it. Optimally, choose a battery that can be fully charged by your charging system during a typical day of driving.
Because the useful life of a battery is highly dependent on temperature, it's best to try and locate your battery somewhere cool.
Grab a bargain on quality 150AH AGM batteries at ![]()
The best battery in the World is no good without an efficient management/charging system. Ideally, you need three components to ensure your battery stays charged and in top condition:
A 240v charger: To provide charging when you have access to 240v power, such as powered sites and when the trailer is parked at home.
A DC-DC charger: This receives power from the tow vehicle and charges the trailer battery when you're on the move. A DC-DC charger is a far better solution than simply running cable from the vehicle battery/alternator down to the trailer. It eliminates the voltage drop issue, which is particularly important on modern vehicles equipped with so-called 'smart' alternators, which reduce voltage when they detect the starting battery is charged. Without a DC-DC charger, there simply isn't enough voltage reaching a trailer battery for it to recharge.
A solar charger/regulator: Unregulated output from solar panels can damage batteries, so it's best to connect them via a proper charger/regulator rather than direct to the battery.
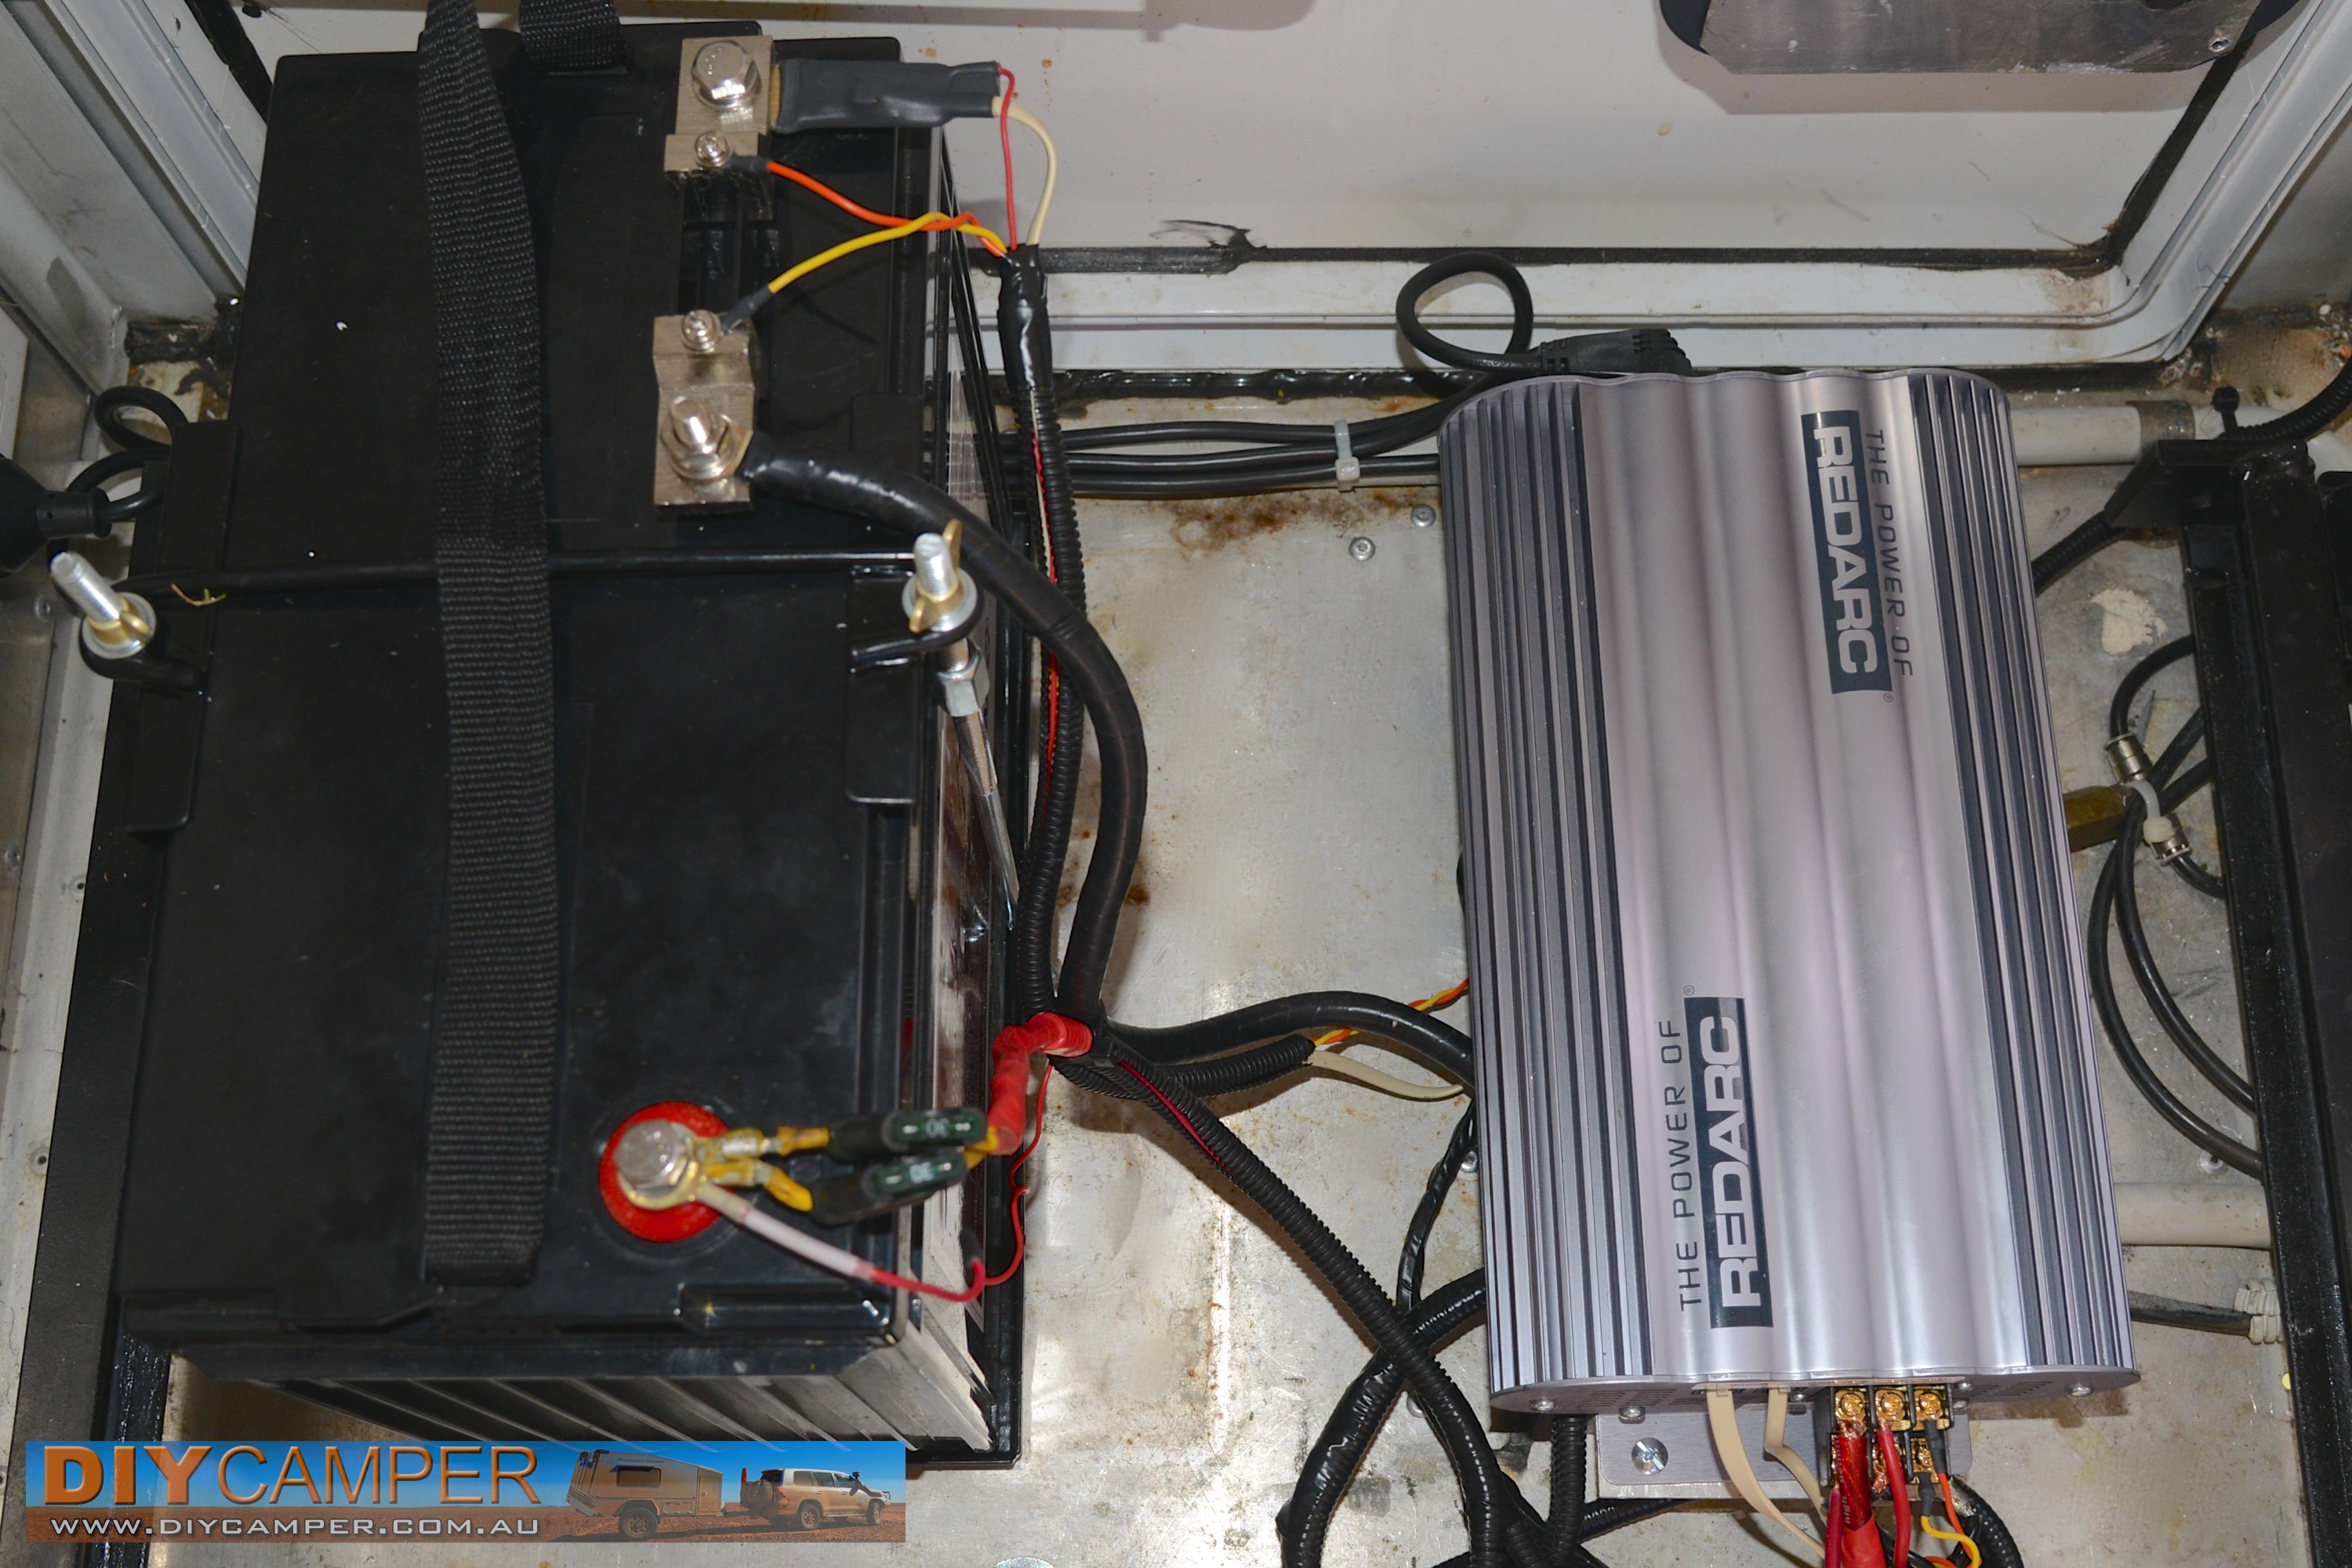
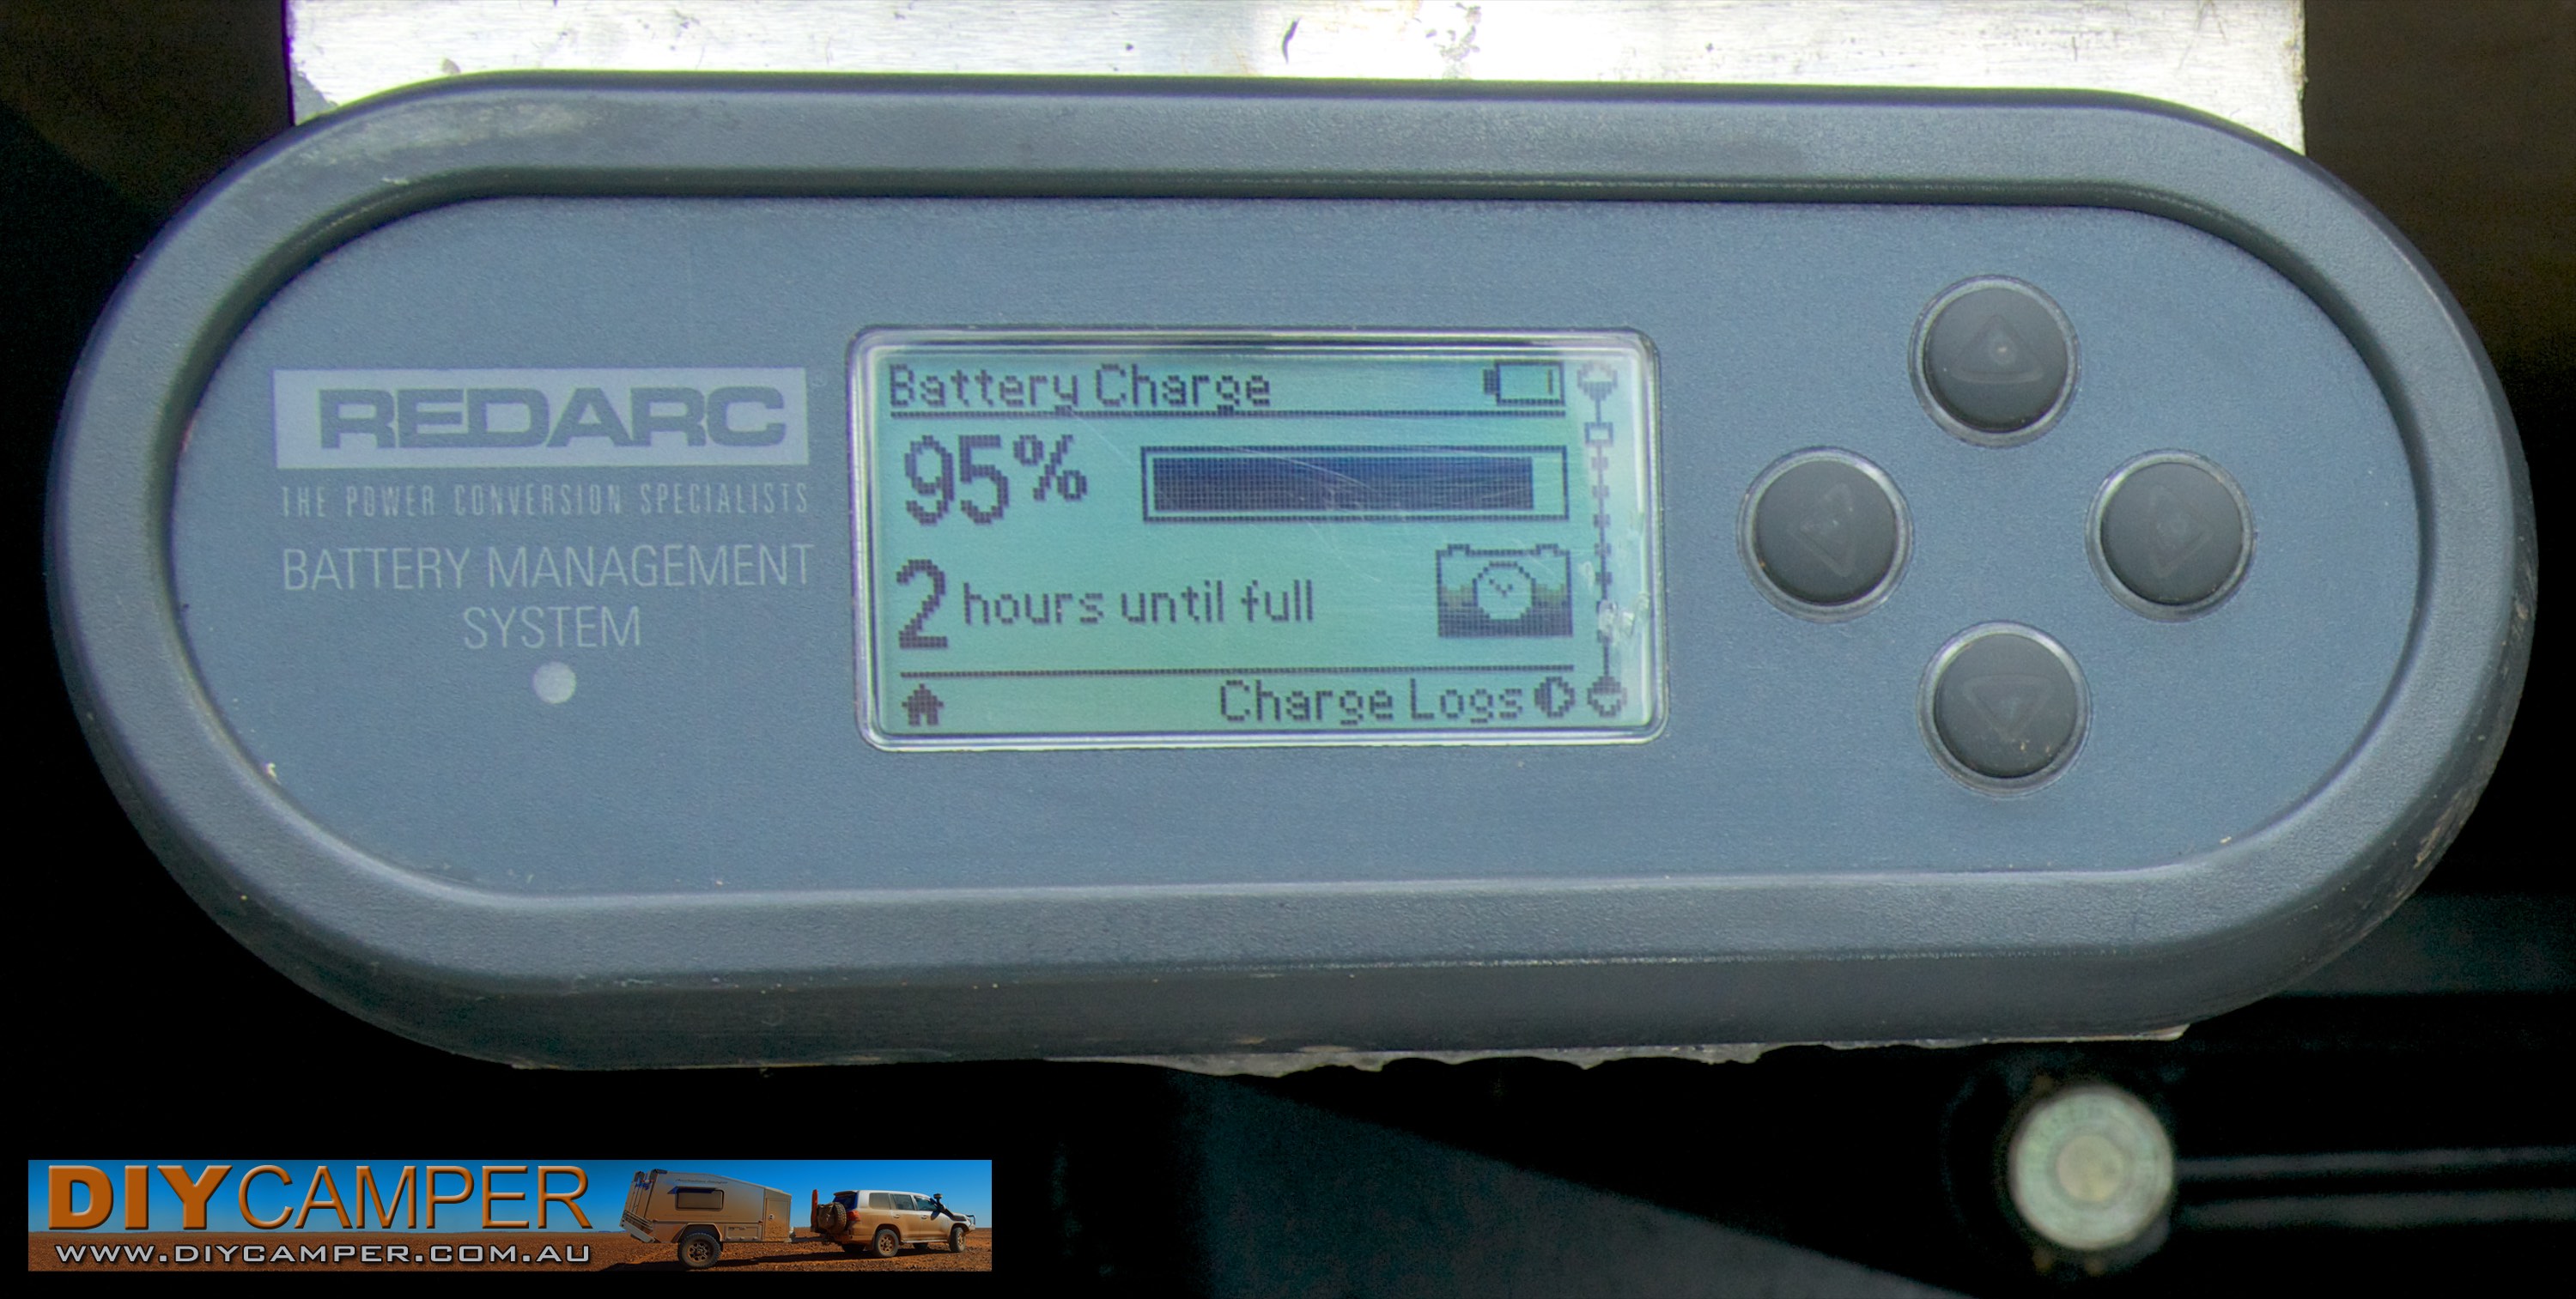
Multi-function devices: There are a few companies producing chargers that combine two of these functions into one unit, but the standout is a Battery Management System from South Australia's REDARC. It not only combines all three functions into a single unit, but it also provides a comprehensive monitoring and management system for the battery, including current charge state, time remaining until a full charge, and -importantly- the estimated time remaining until the battery is discharged, based on current usage patterns. The BMS will inteligently prioritise where it gets it's input energy, to deliver the most efficient charge. For example, if your solar is only delivering 5amps, then it will take that and get another 10 amps from the DC source in order to deliver the maximum charge to the trailer battery while reducing load on the vehicle battery/alternator.
Redarc also produce separate 240v and DC-DC/Solar chargers if the BMS is too comprehensive for your needs. A cheaper option is the range of Ctek DC-DC/solar chargers
, however it should be noted that the minimum DC input voltage for them to operate is 12.7 volts, which can be problematic on modern vehicles due to voltage drop on the long cable run from the vehicle to the trailer. The Redarc BMS and DC/DC chargers operate down to 9 volts.
The 15amp Redarc BMS will set you back around $1200 from the very helpful people at Richards Auto Electrical in South Australia. Give Stefan a call and I'm sure he'll be happy to post one out to you and give you some good advice on the best options and setup for your situation. If you're not feeling particularly handy, then he can also fit it up for you!
Charging from the tow vehicle
The big enemy for efficient trailer battery charging is voltage drop, particularly with modern 'smart alternator' vehicles. Although the Redarc units will operate down to 9v, the lower the voltage the less efficiently they operate, the more current will be required, the more heat will be generated in the cable.
Do not be fooled by auto wiring labels such as "15 amp". All this means is that the cable can carry that current without melting. It won't do it efficiently, and there will be huge voltage drop.
To run a 15-20 amp charger/BMS, run at least 8AWG (~8mm2) cable back to your DC-DC charger, which will result in a voltage drop of around 0.4v. Because auto cable has numerous different descriptors, it may be hard to find the correct cable. 8AWG cable may also be called 8 gauge or 8mm2. It's around 6mm in diameter including the insulation, while the copper core itself is about 3.3mm in diameter. If in doubt, ask the seller what the AWG or cross-sectional area (mm2) of the cable is. For a 30A charger/BMS, you'll want 6AWG (~13mm2)
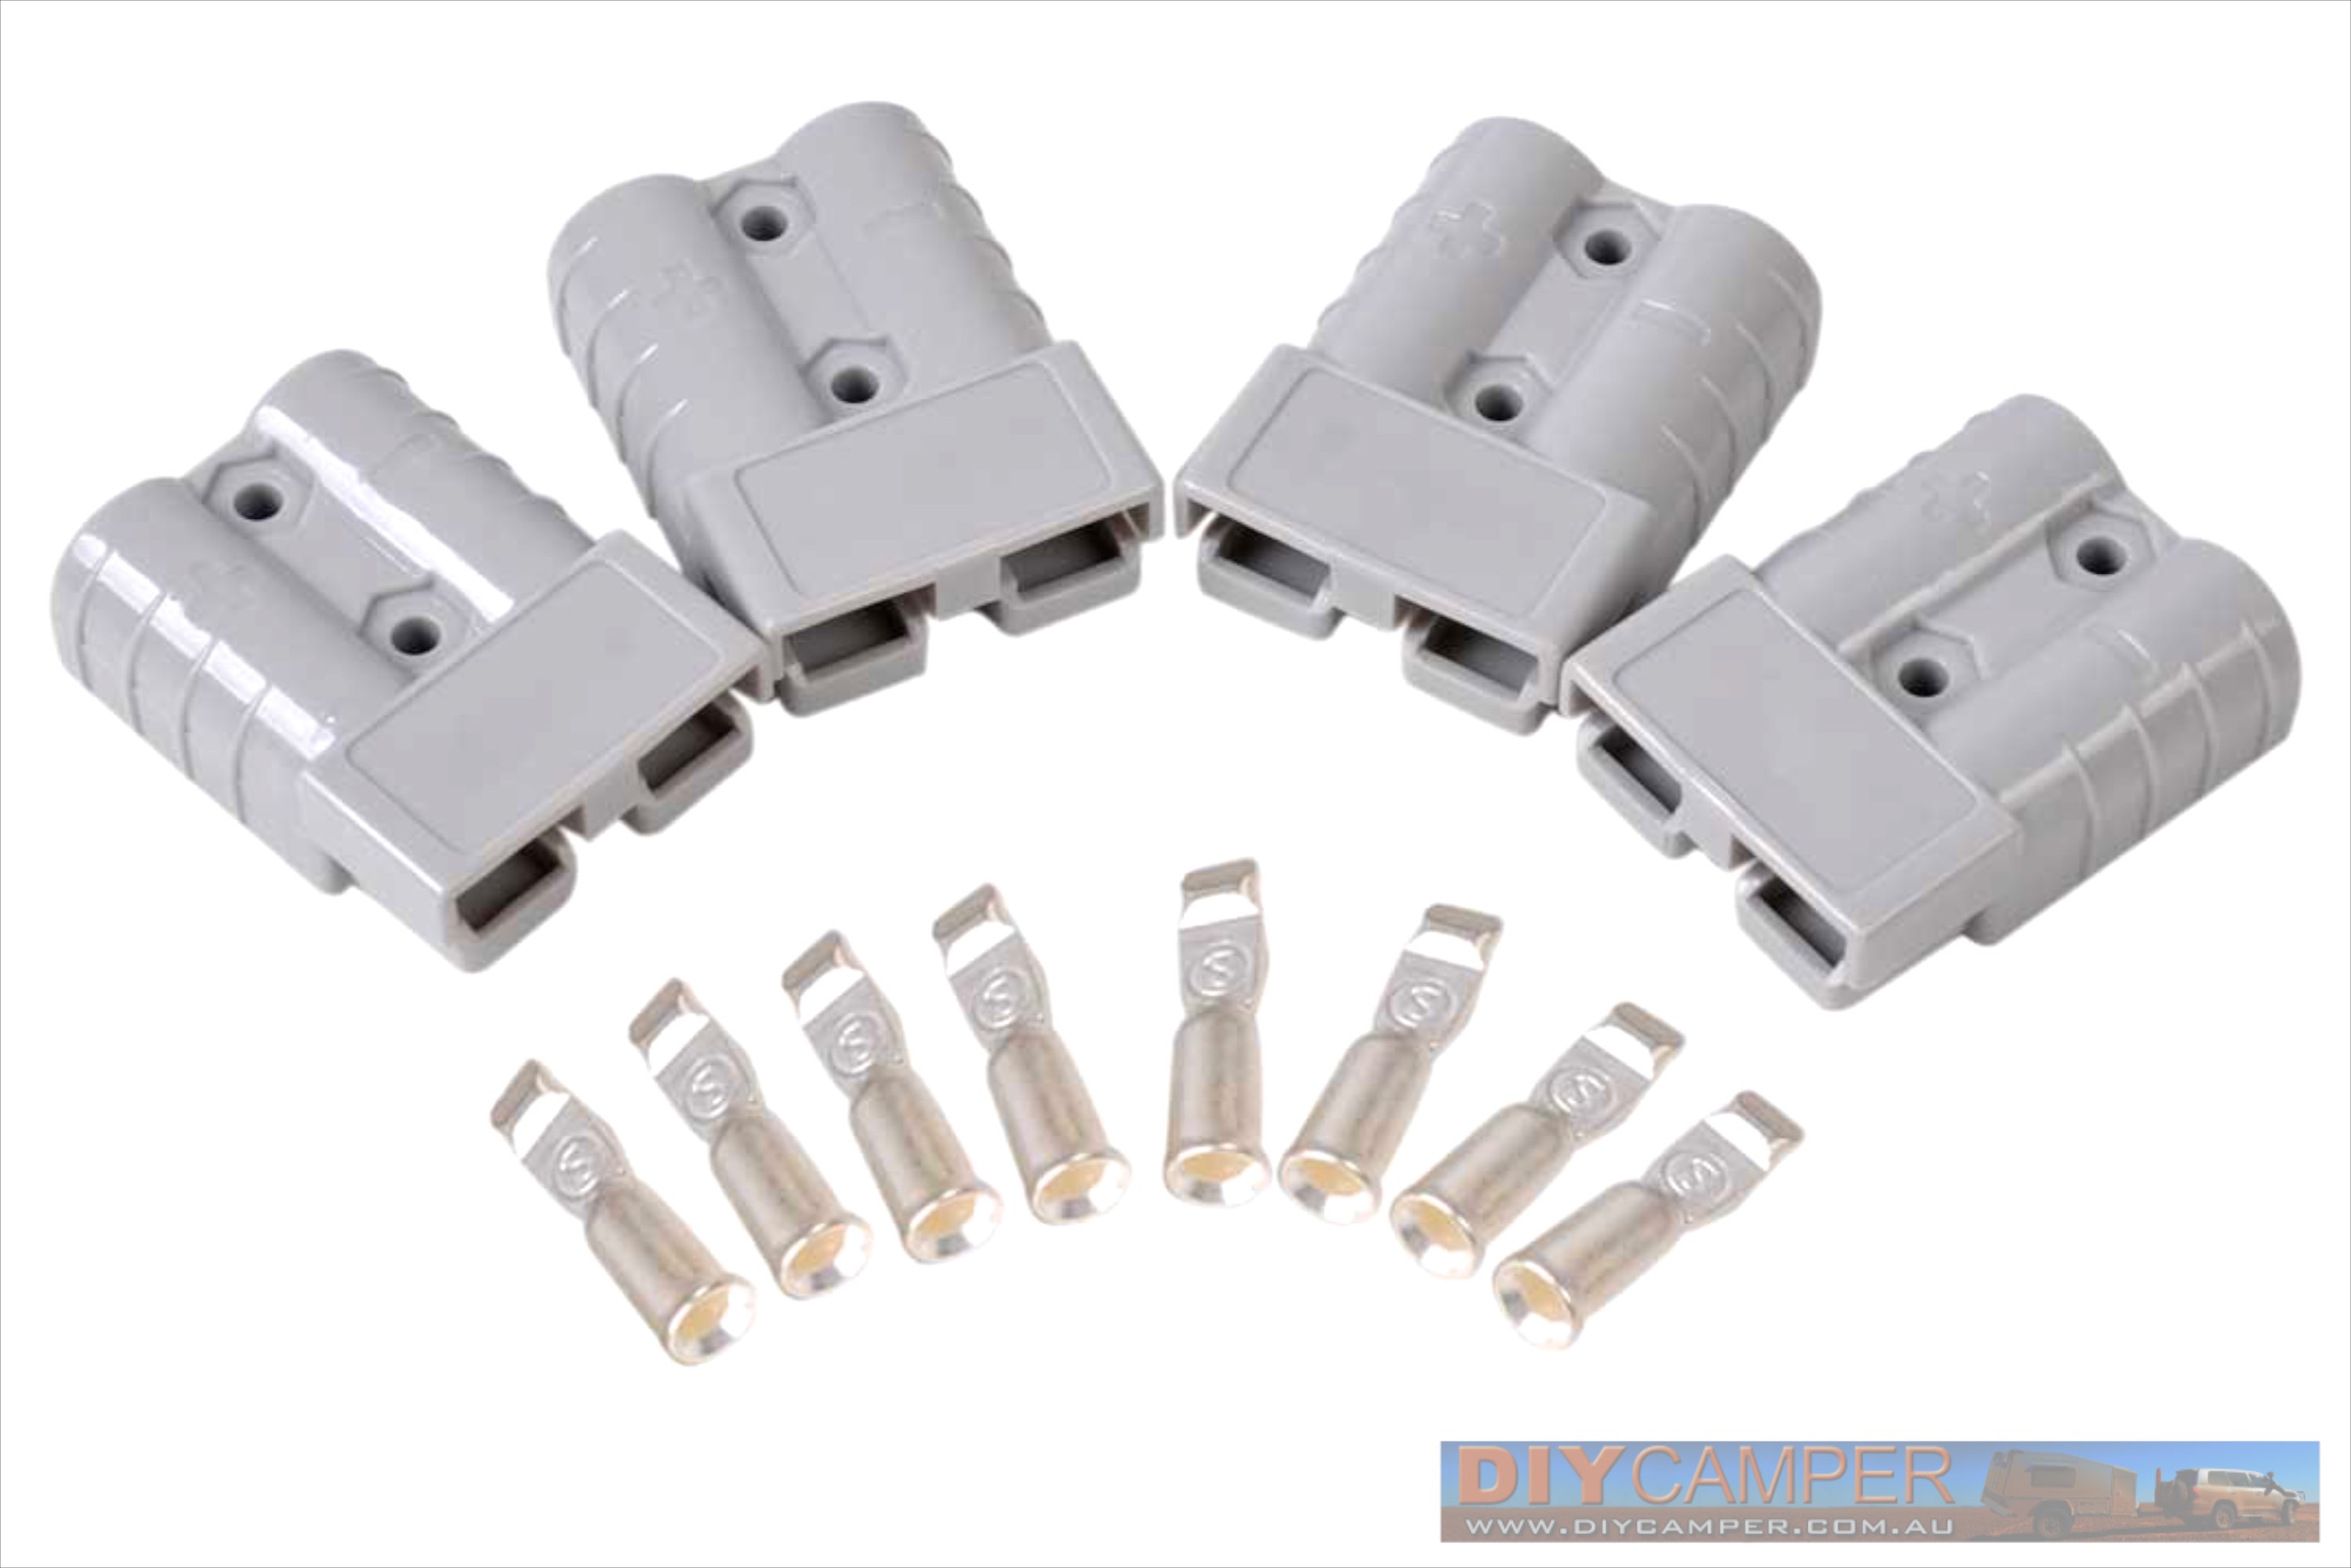
cable. Run this to the trailer using a 50A anderson plug and socket
.
REDARC Battery Management at the lowest prices on ![]()
With many national parks banning generators, solar is currently the only practical solution for extended stays at a campsite (although fuel cells could could eventually come down to a reasonable price). The solar capacity you decide on will be based on the room you have available, the size of your battery, capacity of your charger/BMS and how long you need to be self sufficient.
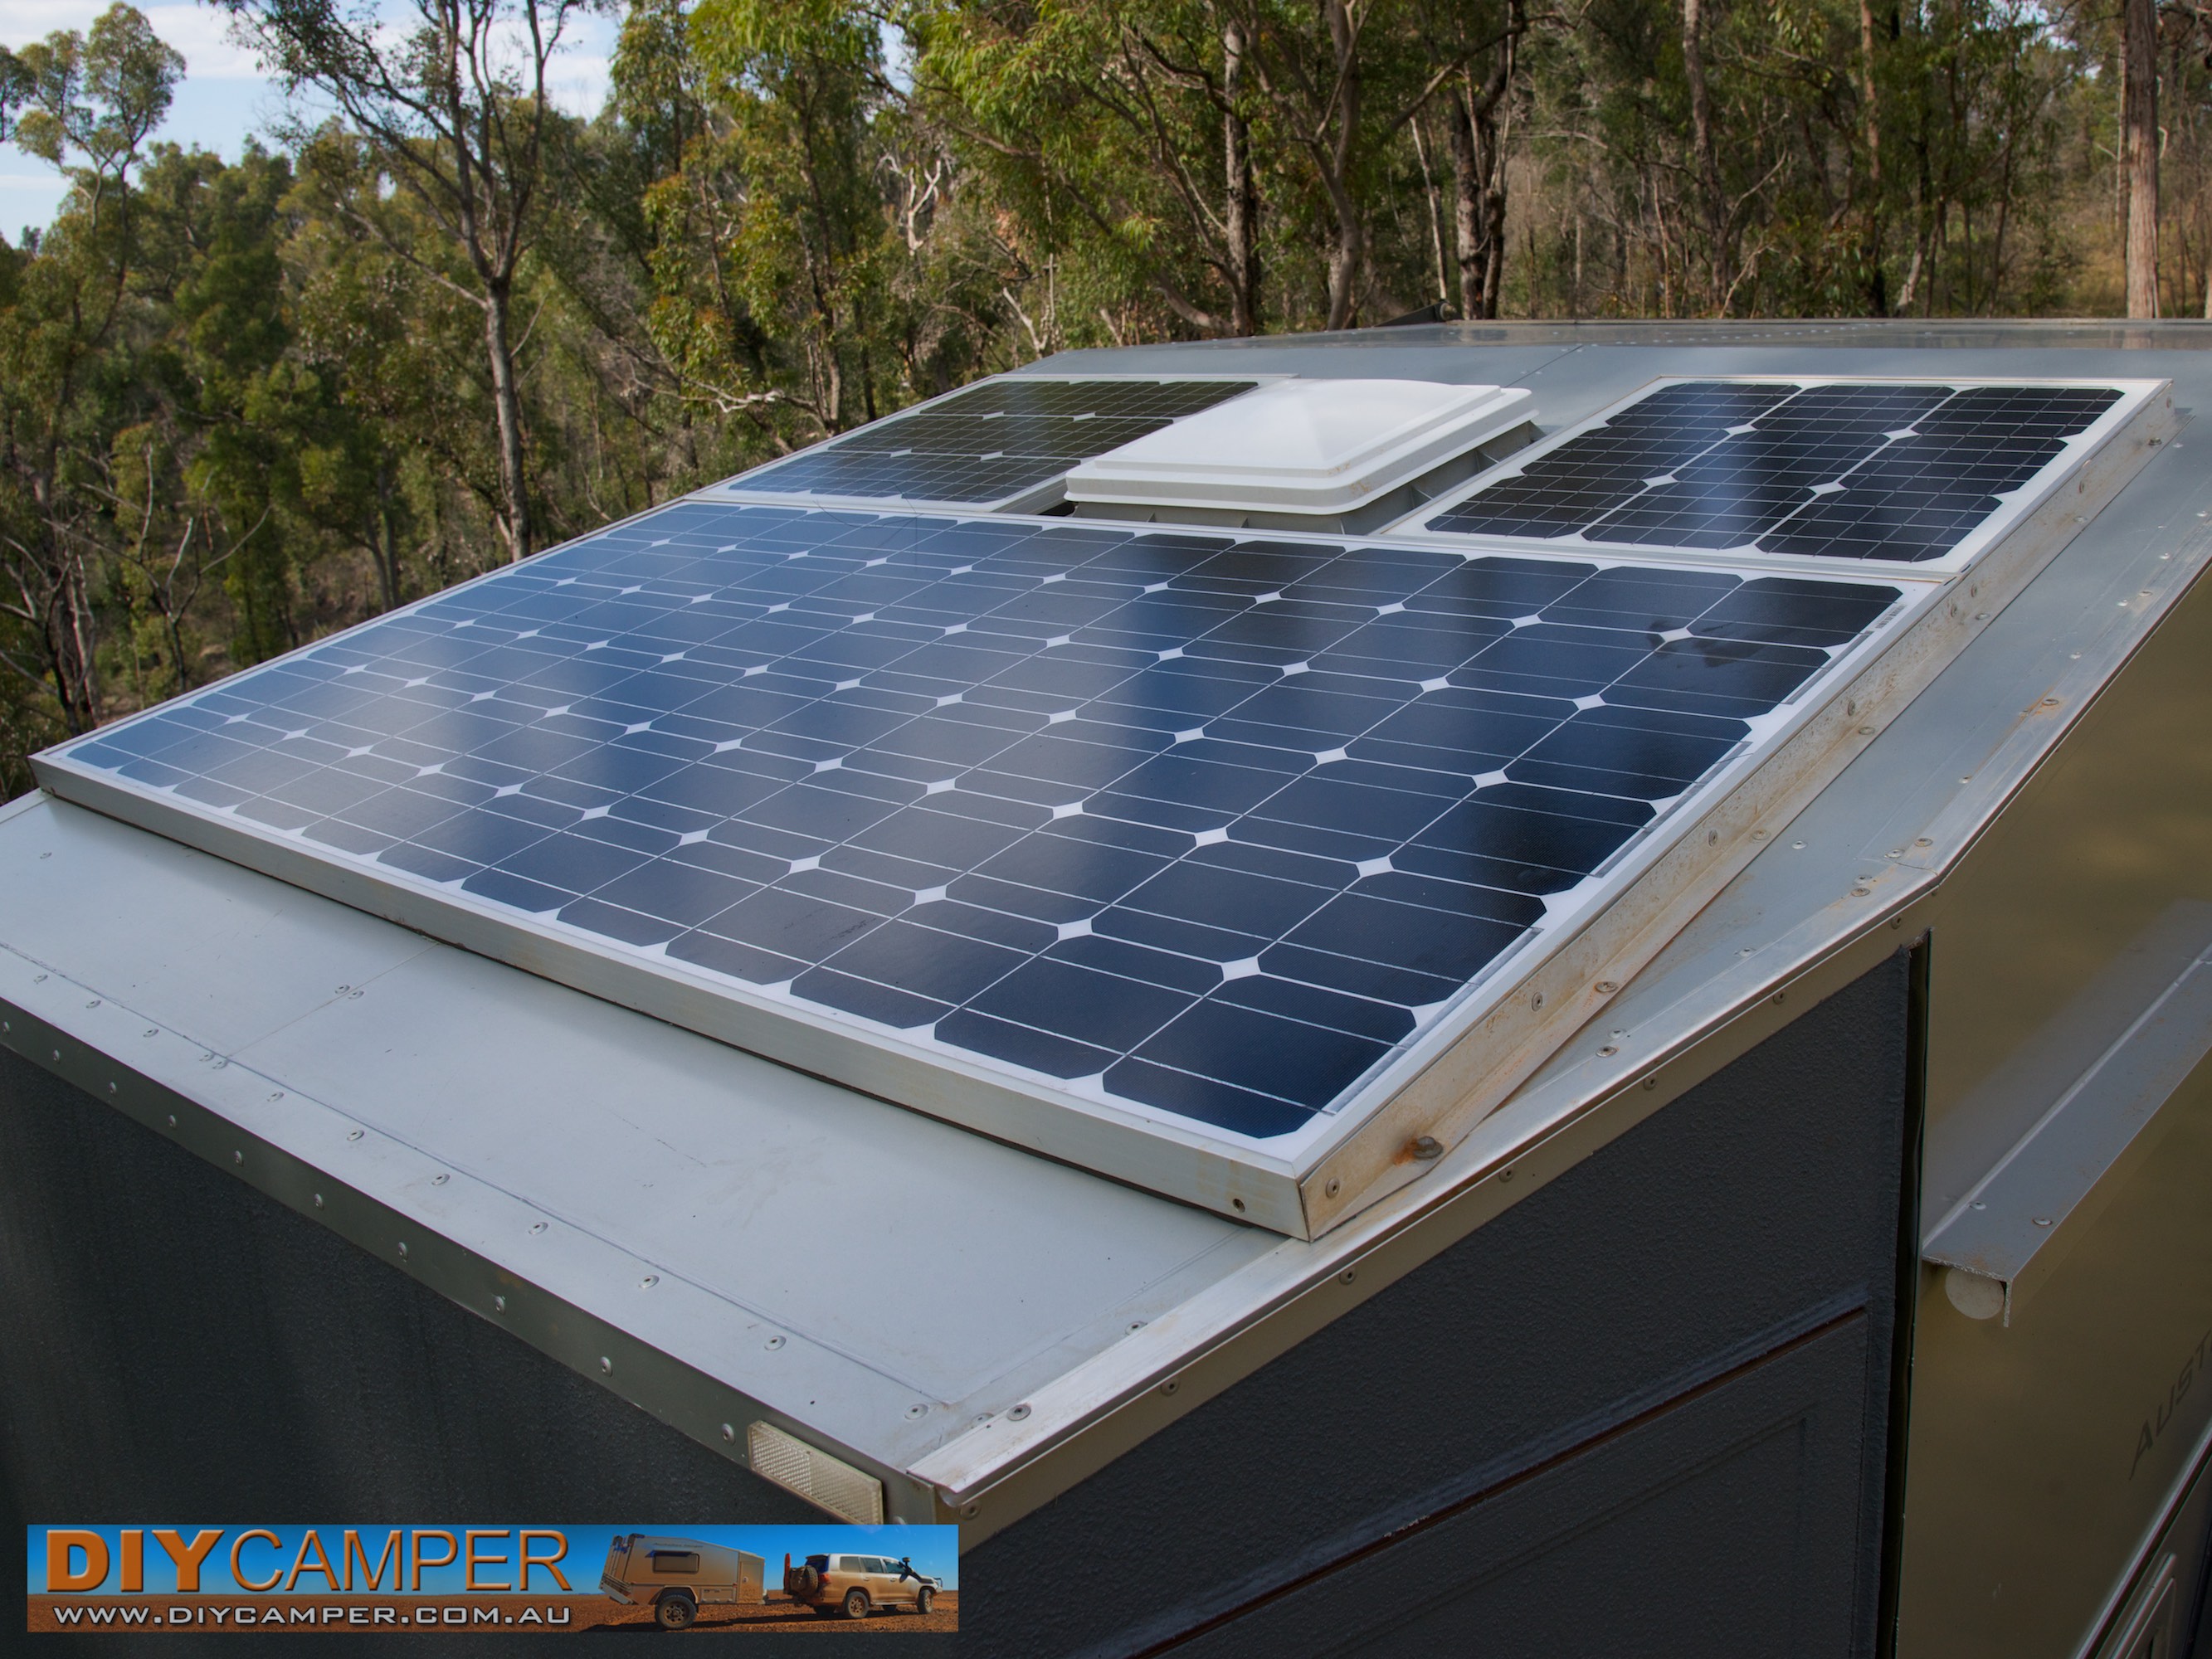
In my case, I've gone with a total of 280 watts of capacity, comprised of a single 200w panel, plus 2x
40w panels. Assuming about 70% output this gives me 195w of output at around 15 volts, which equates to roughly 13 amps. This matches well with my 15A Redarc BMS
. If you plan on fitting more solar capacity, then it would be worth getting a larger charger/
30A BMS to get the most out of it, and a larger battery to store the additional energy.
Almost all panels are made in China these days, and the quality can be greatly variable. Choose a seller that has been around for a while, and if looking for a bargain on eBay, then check that they have a good selling record. While most panels are sold with a 25 year warranty, it doesn't do you much good if the seller folds a few months after you buy the panels!
Ensure you use appropriate capacity wiring for the panels and connect the panels together in parallel with MC4 connectors/junctions to minimise voltage drop between the panels and the BMS.
Before you begin your wiring, use a voltage drop calculator to work out the correct wiring size for the accessory you're installing.
To keep the wiring neat and safe, all power systems should be fused. From the battery, run a fused wire to a small accessory fusebox, then distribute to your chosen accessories (lighting, fridge etc) from there. When I made my trailer, there wasn't much available in the way of accessory fuseboxes, so I used a simple Narva 54424. These days though, the Narva 54433
would be a far better choice.
For exterior lighting, I used sealed fluorescent lights available from DA Pro in Mortlake. The lights draw between 8 and 13w each and provide plenty of light. With the progress of LED technology I would probably use LED work lights if I were building a trailer today, not because they use much less power (the fluoros are actually very efficient), but because the LEDs are longer lasting than the fluoro tubes. For lighting within the cabinets, I used white led clearance lights, which only draw a couple of watts each.
I installed a stereo into the trailer, with an input for an iPod/iPad.
I used Carling type switches throughout the trailer. They are neat, high quality and use minimal power. I also installed an AOB dual USB power outlet
which also fits into the Carling switch slots. The 12v USB outlets are a far better way to charge phones and tablets than using a 240v charger, because they are available all the time rather than just when a 240v connection is available.
Refrigeration in the trailer comes from an Australian-made 60-litre Trailblaza. They have incredibly low power consumption thanks to the thick insulation, which makes them ideal for a camper trailer installation. I chose the 12v-only version for the trailer rather than the 12/240v model, because there's no point switching over when you have access to 240v, you can just rely on the BMS to charge the battery while the fridge is running.

Keep your wiring neat and safe with a fusebox ![]()
Grab a bargain on power components at ![]()
It's best to minimise how much of your equipment relies on 240v, because you won't always have it available. Stick to 12v for as much as possible.
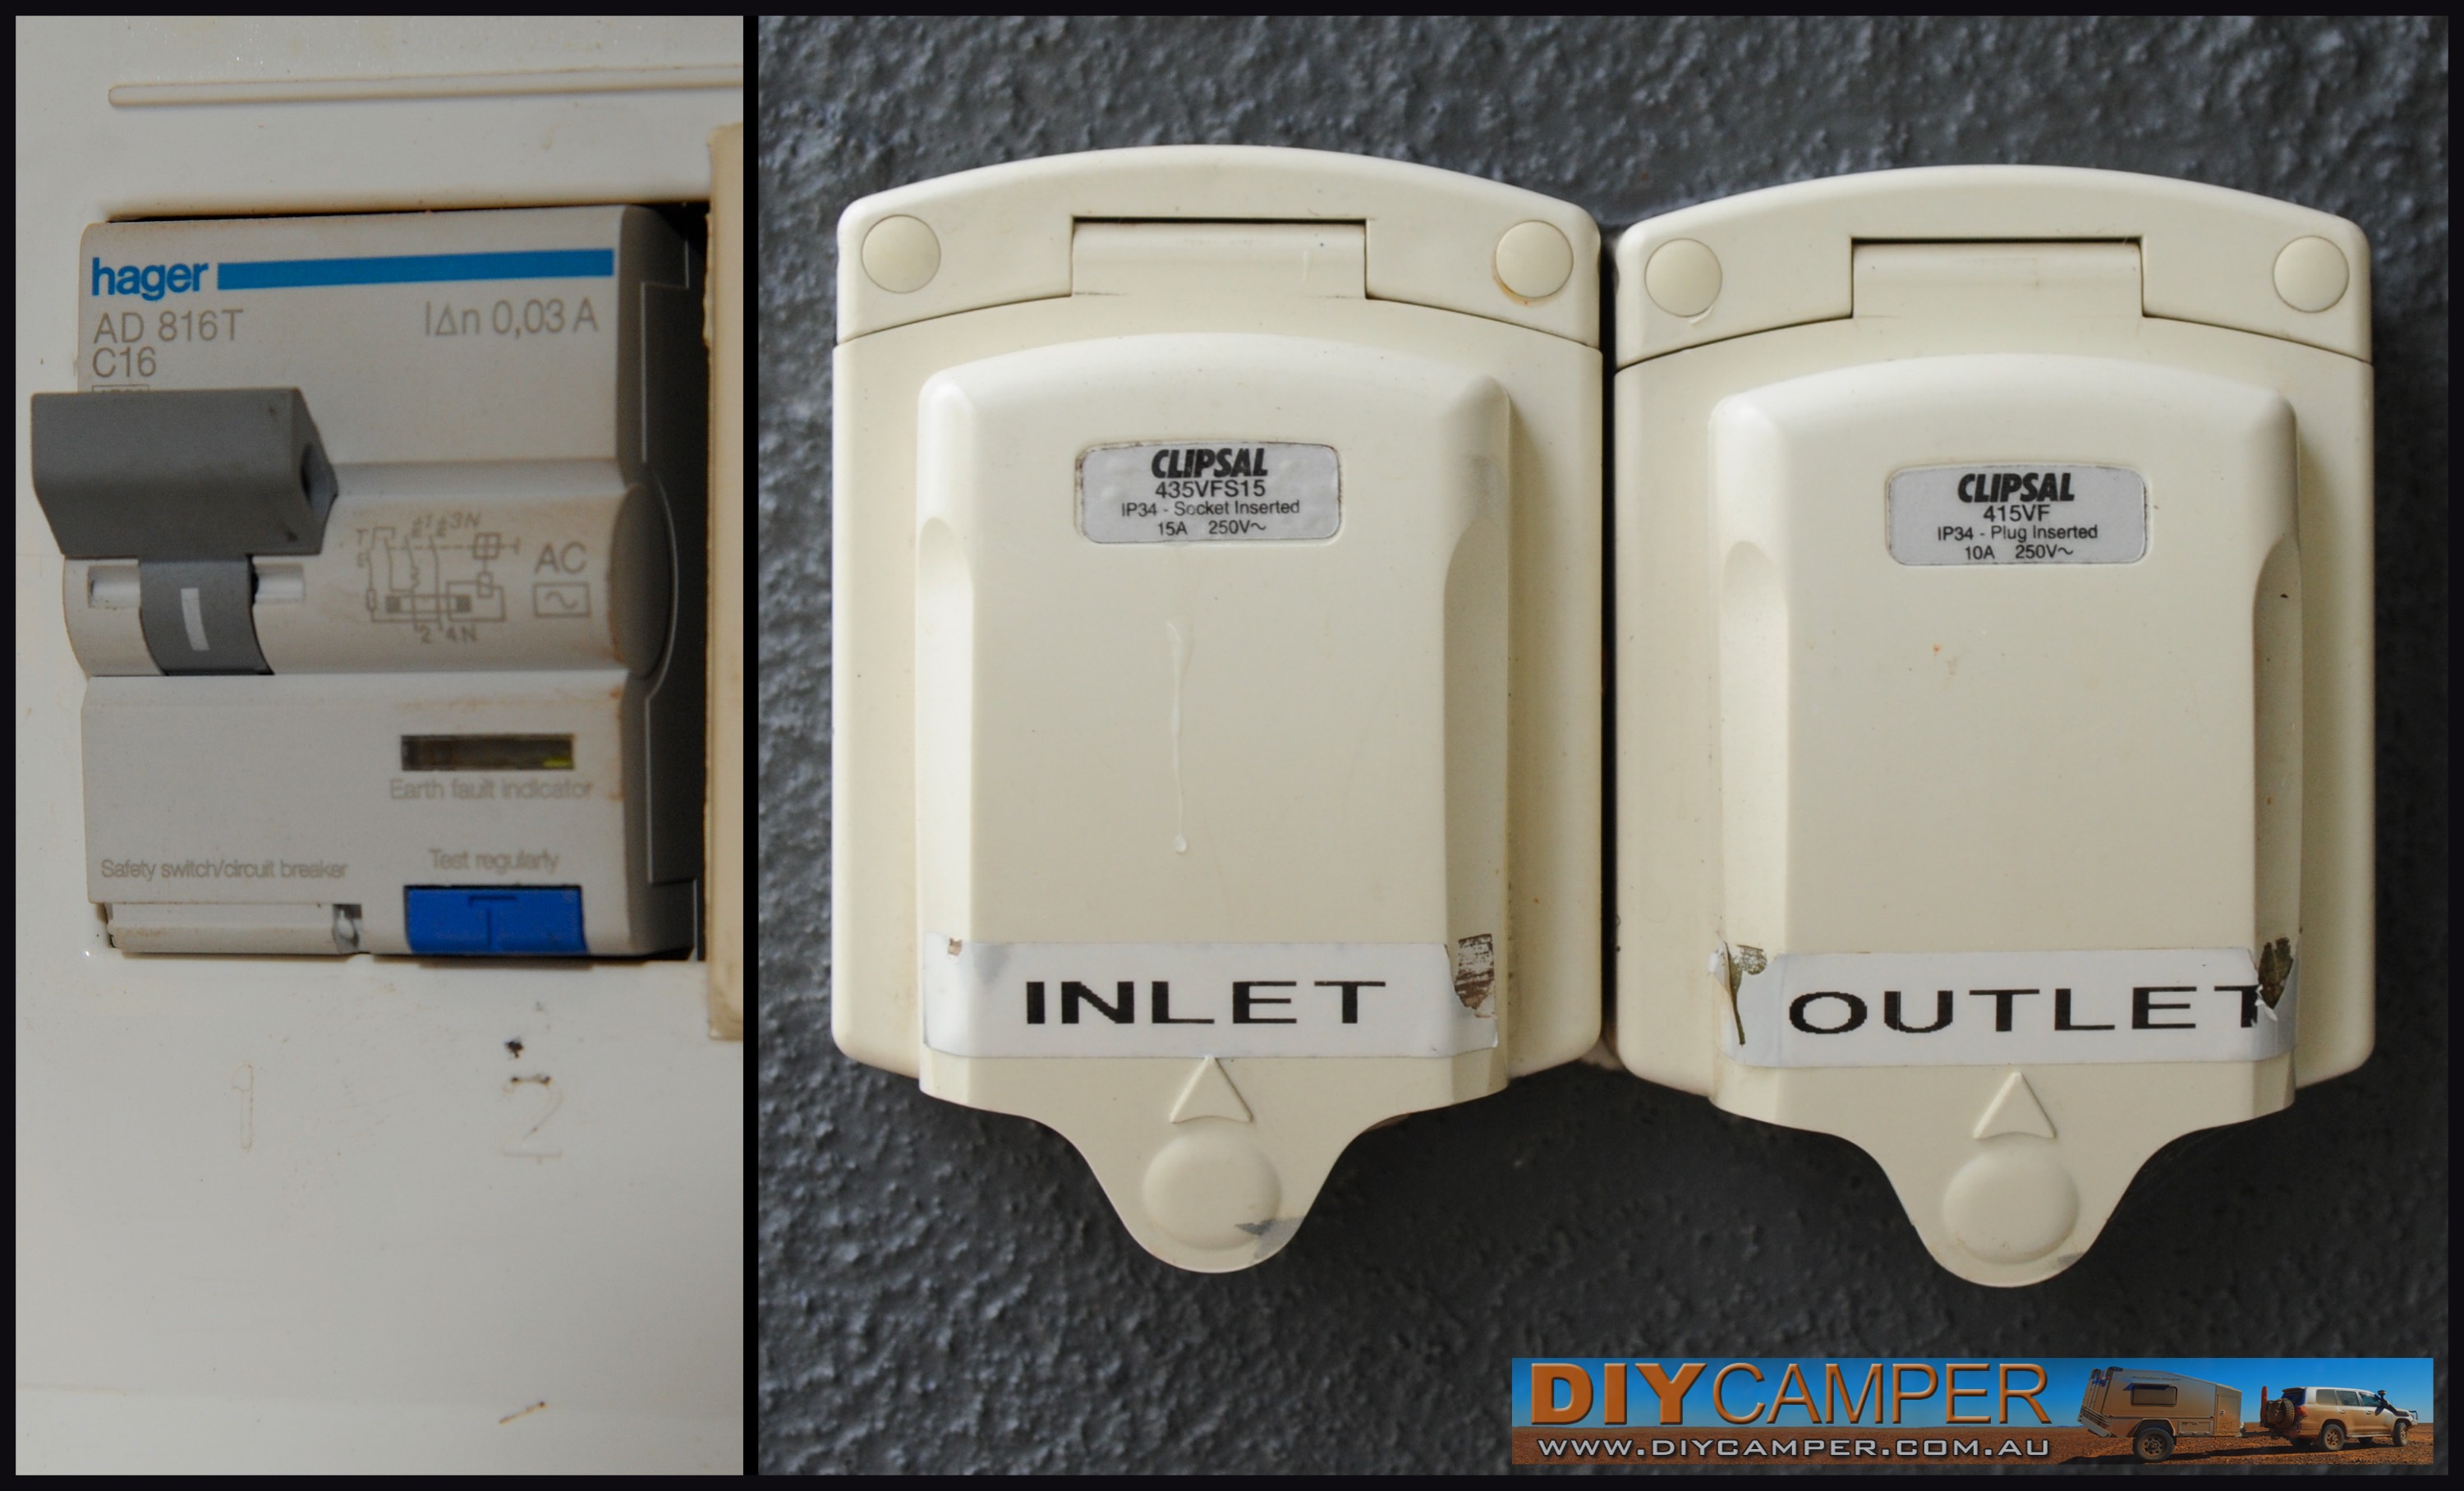
All 240v wiring needs to be completed by a licenced electrician. Note that to comply with caravan wiring requirements, the RCD, all power outlets and light switches must be double-pole, so both the active and neural are switched. Typical domestic power points only have active switching. You can find links to double-pole items in the next paragraph.
For my trailer, I kept the 240v system as simple as possible, while ensuring it was useful. Essentially, it consists of a Clipsal power inlet, which goes through a 16amp double pole combined circuit breaker/RCD device
, (safety switch) installed in a
small distribution board, and is then distributed throughout the trailer through standard 2.5mm twin & earth cable
to standard double-pole power points
plus a single
outdoor power outlet. The only permanent equipment in the trailer running on 240v is a microwave oven and a Redarc battery management system (charger).
The power inlet allows me to plug the trailer in when in storage or at a powered caravan site. I can also plug my 2kVa generator into the inlet and power the system from that.
Inverters
Aside from generators and onsite power, another option to provide 240 volts to your trailer is via an inverter. These take 12v input and transform it to 240 volt output. They are rated by their output wattage at 240v, and come in a variety of capacities. They do use a large amount of battery power, so for frequent high-load use, you'll need a very large capacity battery system. An inverter running a 1000watt appliance (eg a microwave oven) will be drawing 100 amps from the battery. This means a battery connected to a 1000w inverter will need to be able to deliver 100 amps constantly, and a 2000W inverter would draw 200amps. Some deep cycle batteries are not designed to deliver such high current, so make sure you check before you buy a battery.
I don't have an inverter at this stage, as I haven't had the need. However, if I do install one I'll be looking at one of Redarc's pure sine wave inverters, probably around the 1500w capacity level, to ensure I have enough power to run high-load devices when required.
![]() If you found this page useful, please like or share on facebook!
If you found this page useful, please like or share on facebook!