Chassis and Running Gear

The most important single component of your camper trailer. If the chassis fails, then it's all over. Not only can this mean abandoning your trailer in the middle of nowhere, but a failure is potentially lethal to yourself and other road users.

Fabrication and Materials

Steel chassis fabrication
Chassis fabrication

Looking for independent suspension? 

Sketchup 3D CAD camper trailer chassis

Download Chassis CAD files
Sketchup file (6MB):
AutoCAD DXF file (4MB zipped):
WordPress Data Table Plugin

There are a few chassis specifications that every quality off-road camper trailer has in common. Anyone building their own trailer would do well to follow their lead:

Quality steel

Give the cheap Chinese stuff a miss, and go with quality painted tube, manufactured to AS1163. Depending on the weight and design of your trailer, wall thickness might vary between 3-4mm for the main chassis rails. If in doubt, speak to a qualified engineer. Don't use pre-galvanised sections (eg Duragal), as they impede welding and the exterior coating offers vastly inferior corrosion protection compared to hot-dip galvanising after completion.

Strong, integrated cross-members

Don't skimp on the crossmembers by using light tube or angle, simply welded to the inside wall of the chassis rails. The crossmembers need to run right through the chassis rails in order to give strength and rigidity to the chassis.

Good quality welding

If you're welding your own chassis together, make sure you've got the skill and equipment to do the job properly. The welder needs sufficient current to achieve full penetration, otherwise every join will be a significant weak spot.

Galvanising

After fabrication, the entire chassis needs to be hot-dip galvanised to control rust/corrosion. There are generally galvanisers located in every capital city. Ensure you check the sizes they accept, and which orientation they will dip in before toy finalise fabrication. You will need this information so you can drill vent and drain holes in the chassis.

 My Trailer

When designing my chassis, I incorporated the above criteria. The chassis rails/drawbar are made from a single piece of 100x50x3mm RHS down each side. Rather than cut right through the RHS where the chassis rails 'bend' to become the drawbar, I cut out a wedge and hinged them to the correct angle, so the outside vertical of the RHS remains uncut, and is welded on the other three sides. I then added a piece of 40x3mm flat bar over the join to reinforce the 'weak' spot. If you have access to a tube bender with sufficient capability, then this would also be an option.

The main crossmember (where the suspension trailing arms are attached) is also 100x50x3mm and is interlocked with the chassis rails, rather than being simply welded to the inside edge. This was acomplished by cutting a notch out of the chassis rails and the crossmember, slotting them into each other, then welding all around the joints.

For the front and rear crossmembers I used 50x50x3 SHS steel, again interlocked with the chassis rails, while the shock absorber crossmember behind the axle is notched into the chassis rails by about 20mm on each side. There is also a 50x50x3mm steel angle running down the centre of the trailer as a floor support, and also around the front edges under the storage areas.

Where the drawbars meet at the front of the trailer, there is a 10mm plate for attaching the hitch which is welded to the bottom of the drawbar rails, and also twin 50x50x3mm angles welded to the inside top of the drawbar rails, which serve to eliminate any flex of the rails, and also provide a step.


Affiliate link notice:
This site contains affiliate links, for which I may receive a commission if you click on a link and make a purchase of any item on eBay. The price you pay is unaffected.

Suspension and Running Gear

Having good suspension on your camper-trailer is vital to effectively isolate the trailer (and its contents) from the harsh terrain while driving off road. There are a few different systems on offer, but no matter which one you go with, shock absorbers are vital to ensure the suspension works as well as possible.

Live axle with leaf springs

This is the cheapest option available, but has serious drawbacks compared to independent suspension. The ride is harsher, which puts more strain on the structural integrity of the trailer itself. The leaf springs themselves are also more prone to failure than coils, but on the upside they are also relatively cheap and easy to replace.

Independent with coil springs

This is by far the most popular suspension type offered on premium off-road camper-trailers. There are several brands on the market, which all operate on a similar principle of trailing arms with shock absorbers. In my experience, the Australian Cruisermaster XT system from Vehicle Components is very hard to beat. Track Trailers have also developed their own innovative system called MC2, which they use on their trailers, but it's not available to purchase as a DIY project.

Independent with airbags

Airbag suspension is becoming increasingly popular due to the excellent combination of ride and variable load capacity the systems offer. The benefit of airbags over coils is that the ride quality isn't dependent on the weight of the trailer. Another benefit is that the bags can be inflated/deflated individually, allowing you to level the trailer when camping on on uneven ground. Vehicle components can customise their Cruisermaster XT Air systems to suit your trailer, and offer choices between manual ant automatic inflation, as well as numerous options for brakes and hubs.

For my trailer, I went with Cruisermaster Air combined with manual inflation via paddle switches. Although I've never had a failure, I do carry a spare airbag with me at all times, just in case. I chose the large 10" marinised electric drum brakes.

Wheels and tyres

Ideally, the wheels and tyres of your camper-trailer should match the towing vehicle. This allows them to be interchanged in case of multiple flats and reduces the number of spare tyres you need to carry. In the case of my trailer, I'm running 17x8" ROH Octagon wheels fitted with 285/70R17 Mickey Thompson Baja ATZP3 tyres.

Cruisemaster Air independent suspension

Looking for a DO35 coupling at the lowest price? 

ROH Octagon
The camper is fitted with 17x8" ROH Octagon 
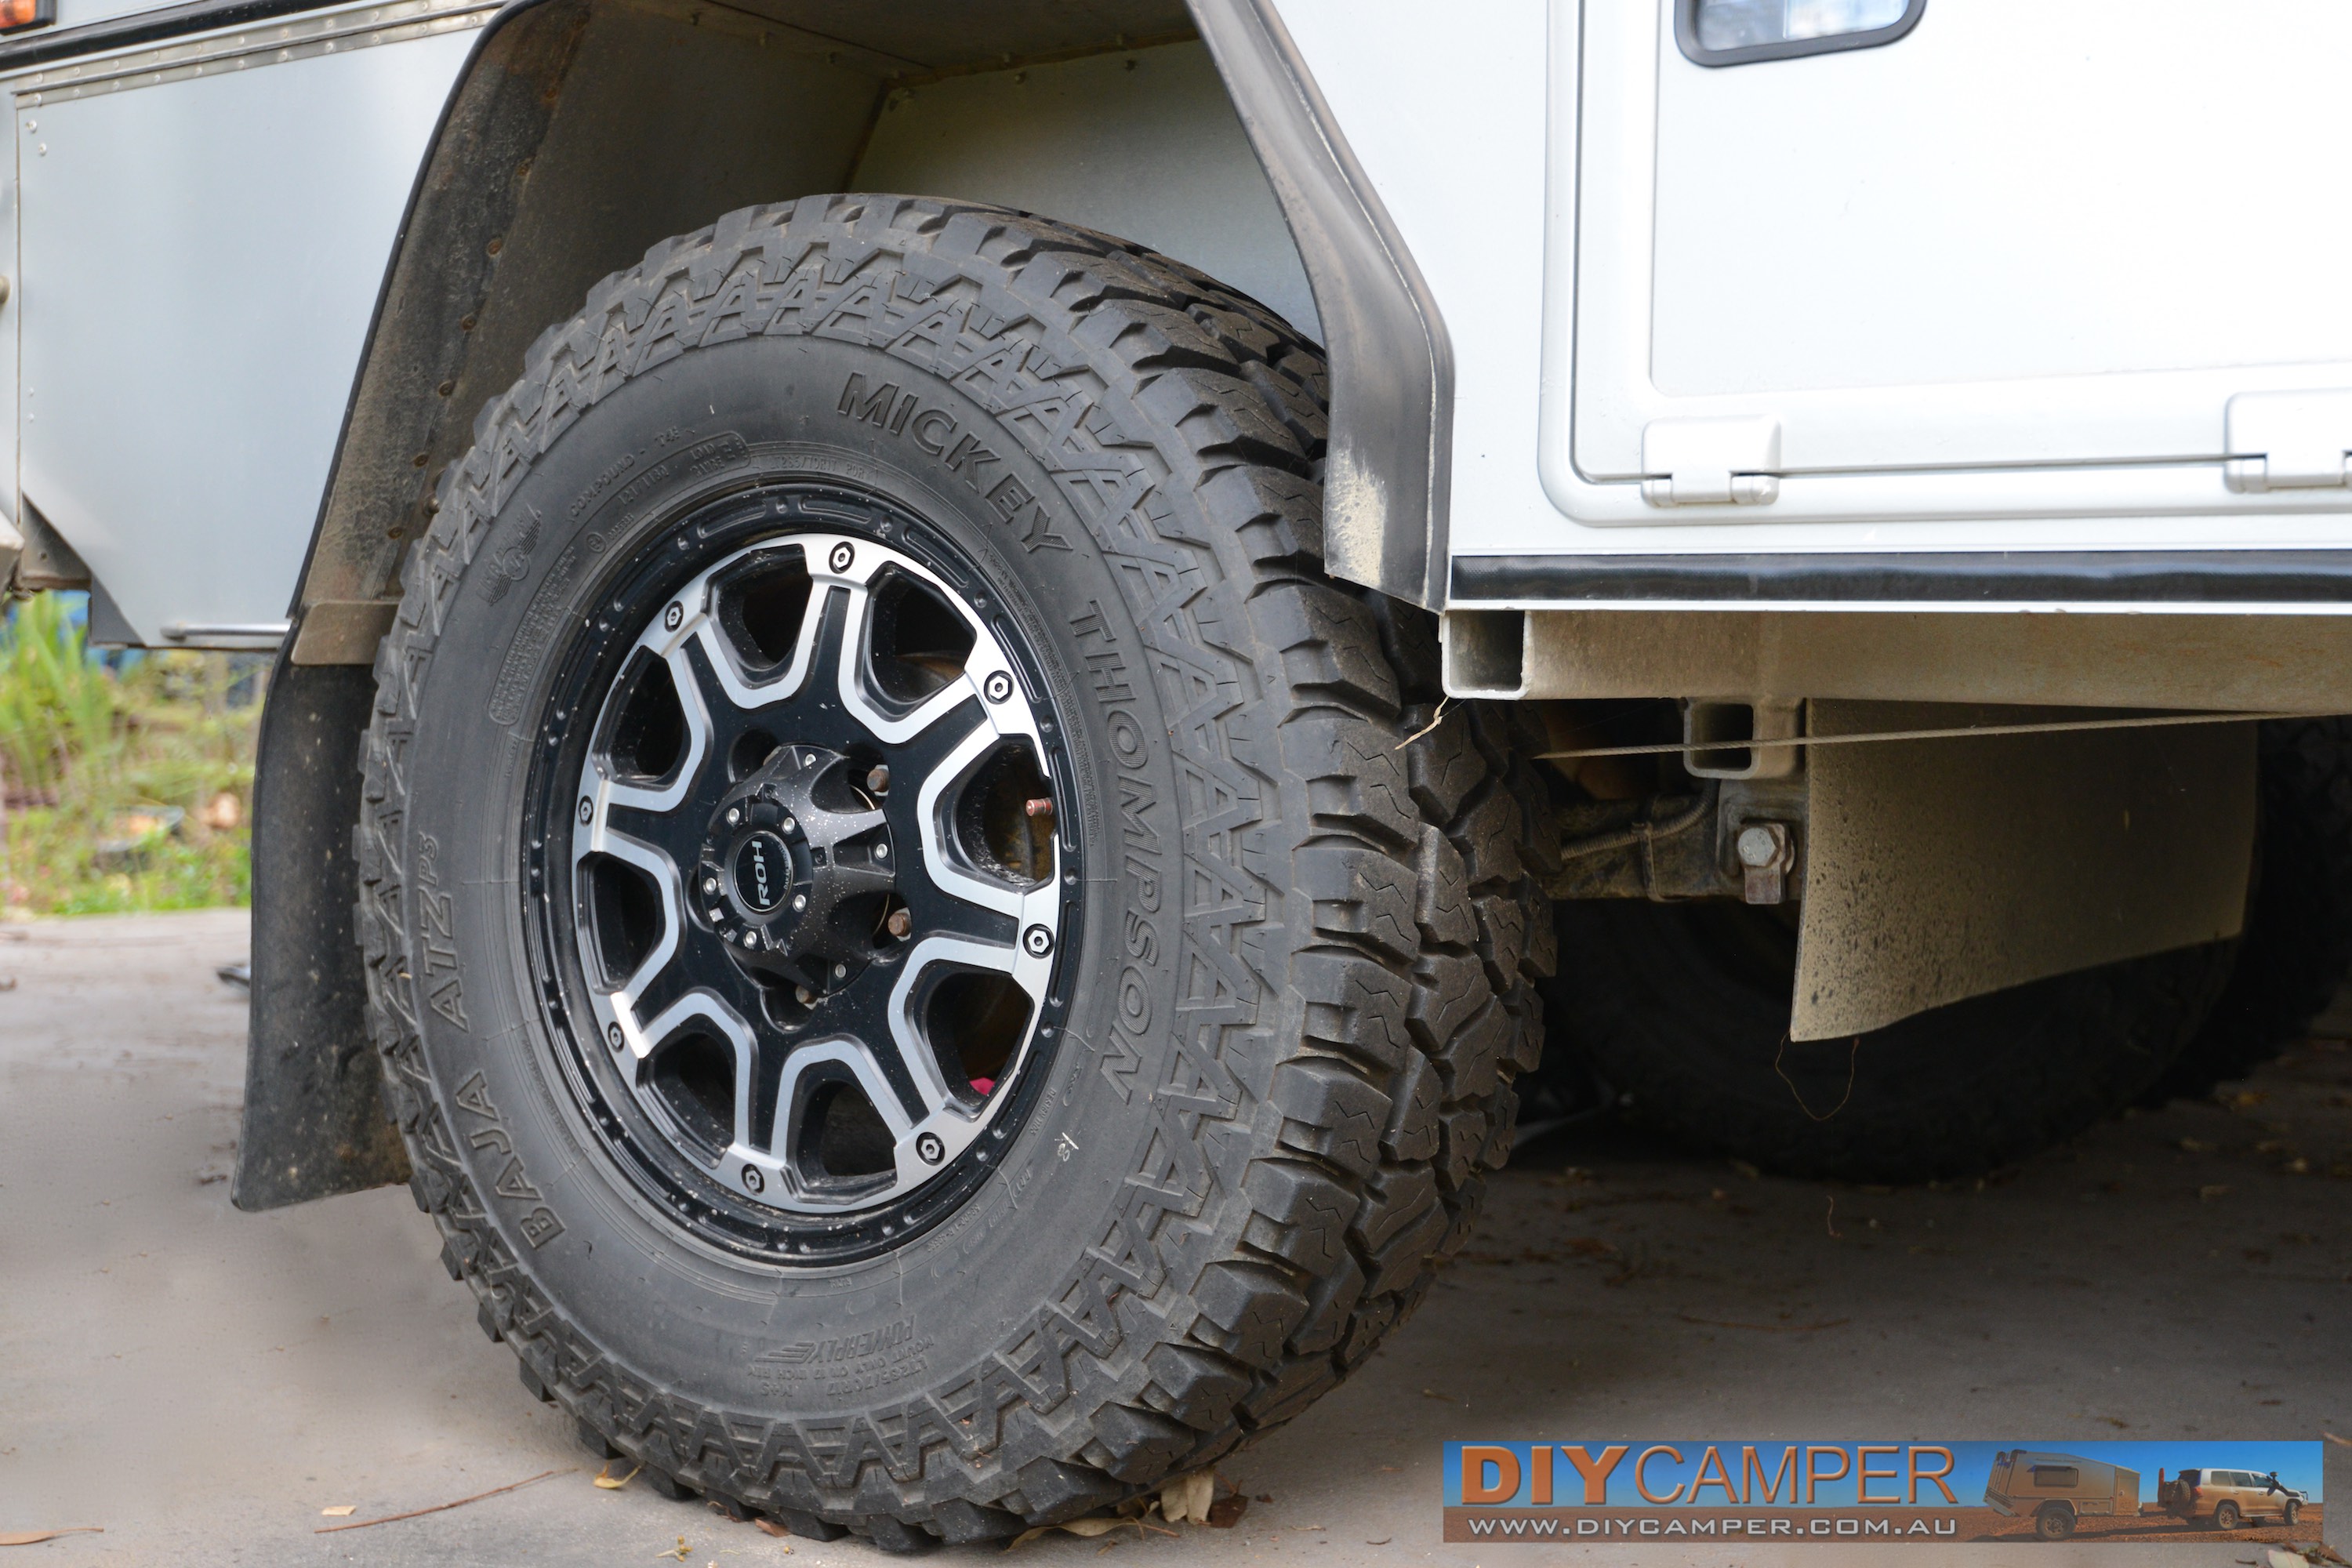
alloys, shod with 285/70R17 Mickey Thompson ATZ P3 tyres, matching the tow vehicle


Chassis-mounted components

Vehicle Components' DO35 coupling

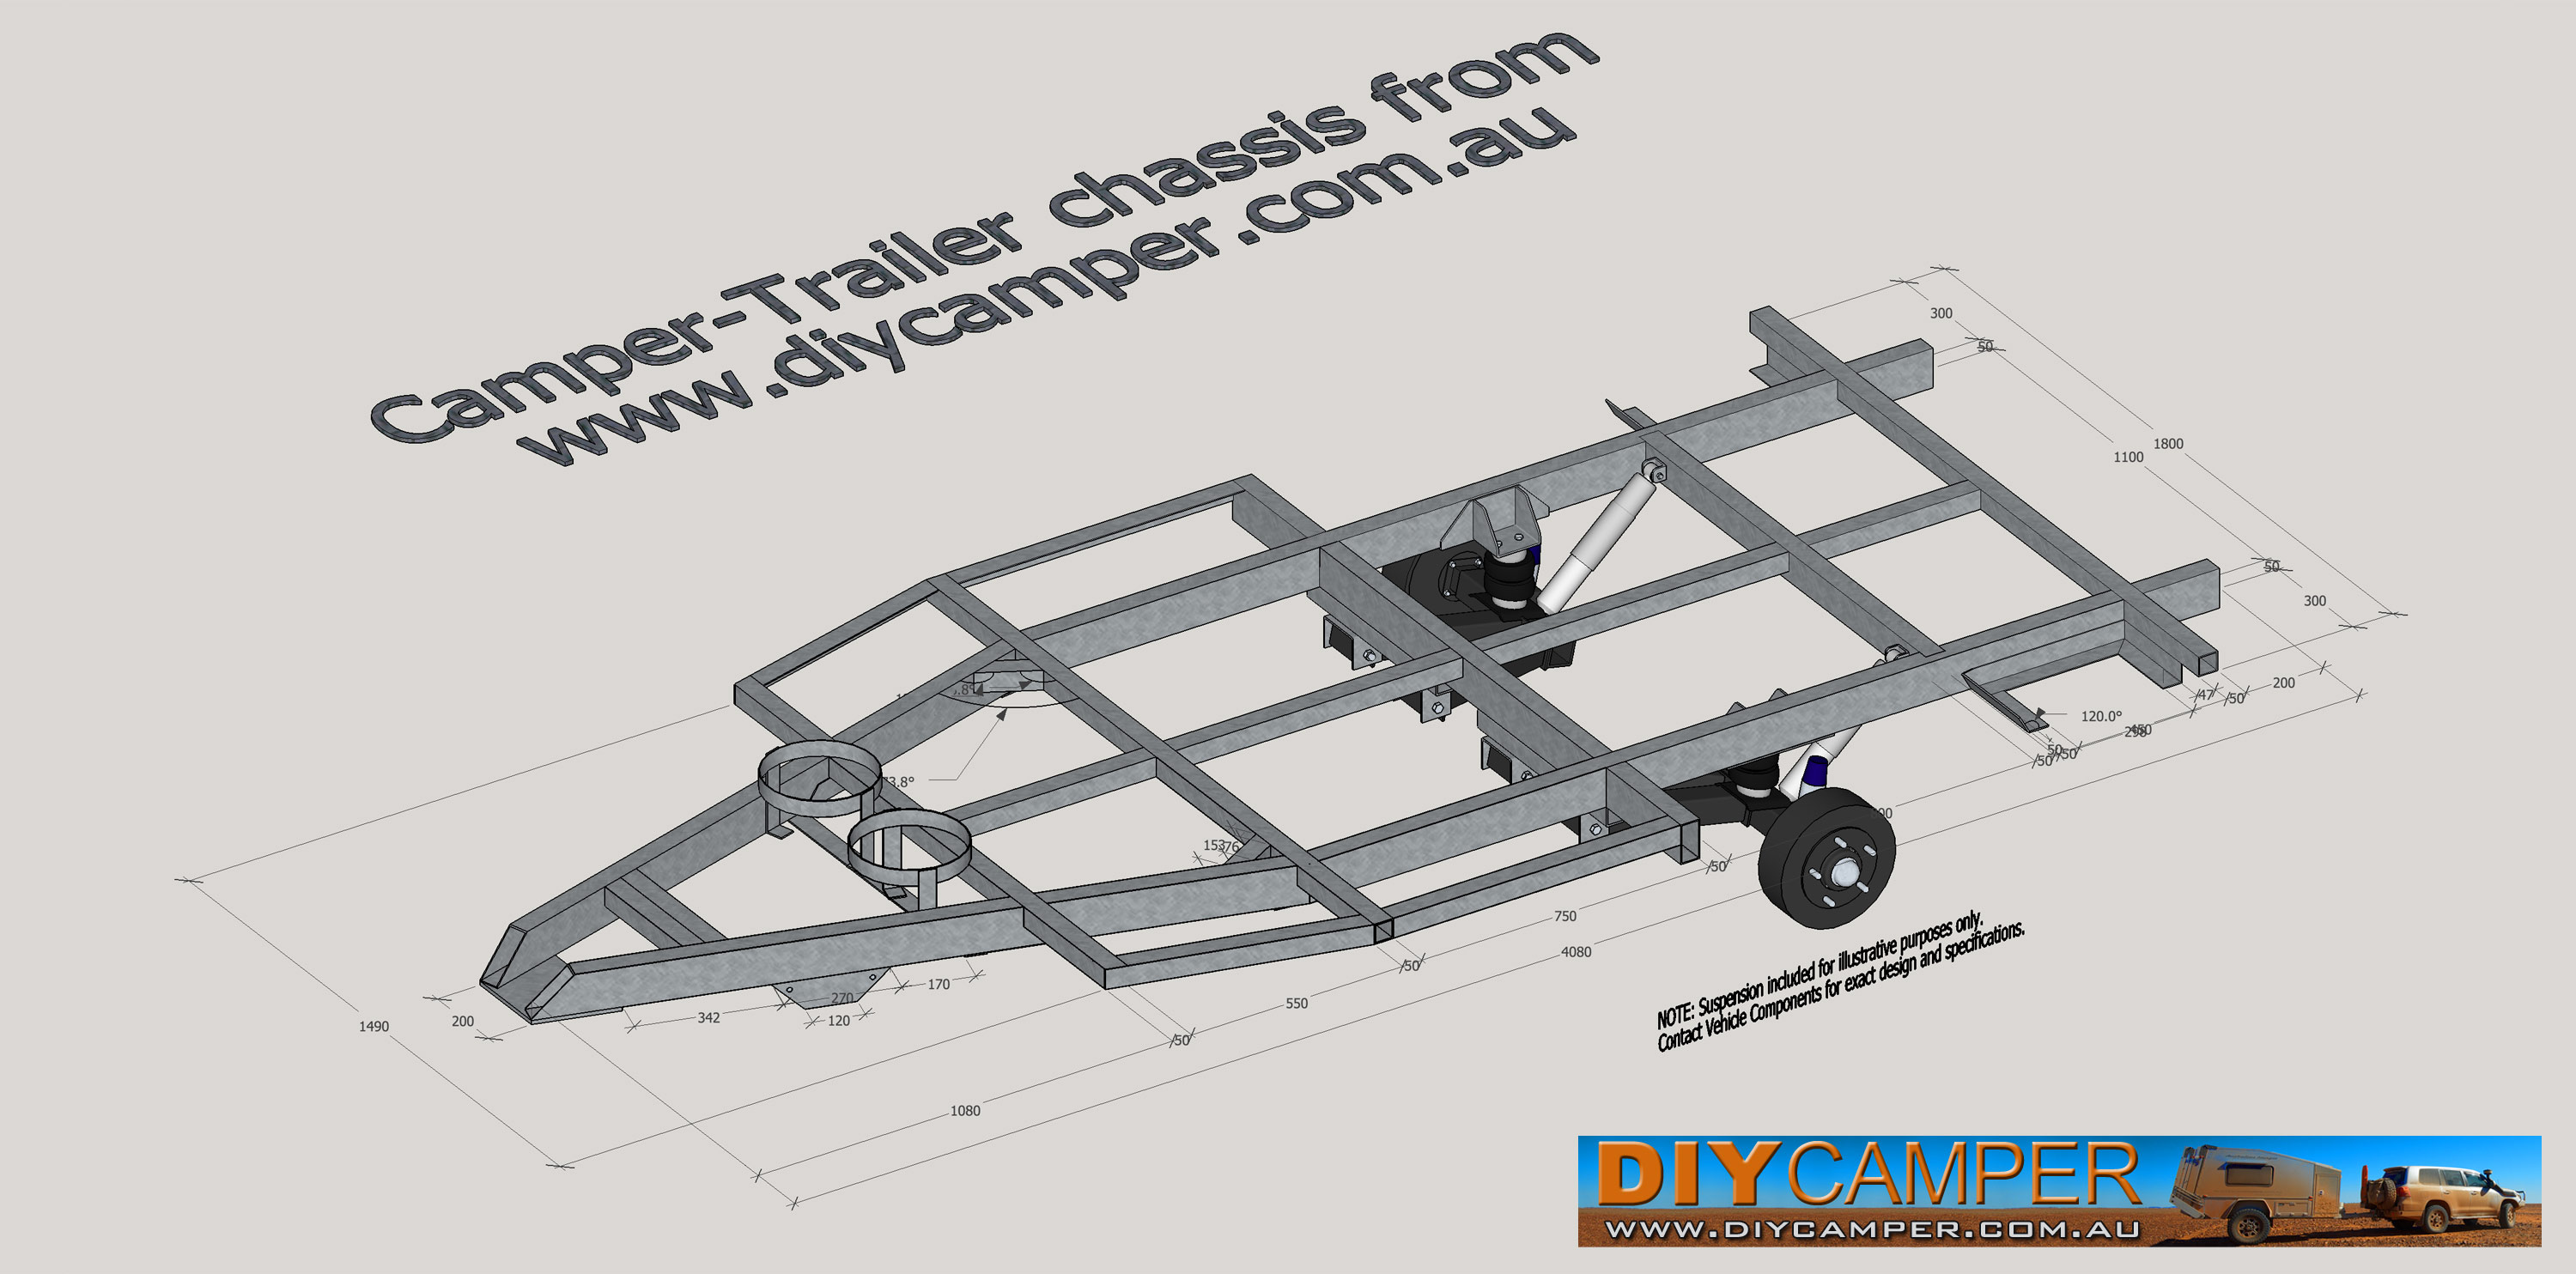
While fabricating the chassis, consider the selection and fitment of permanently-mounted components such as the jockey wheel bracket, gas bottle holder(s) and jerry can holder(s), safety chains and brackets for water tanks. These must all be attached before you send the chassis for galvanising.

Hitch

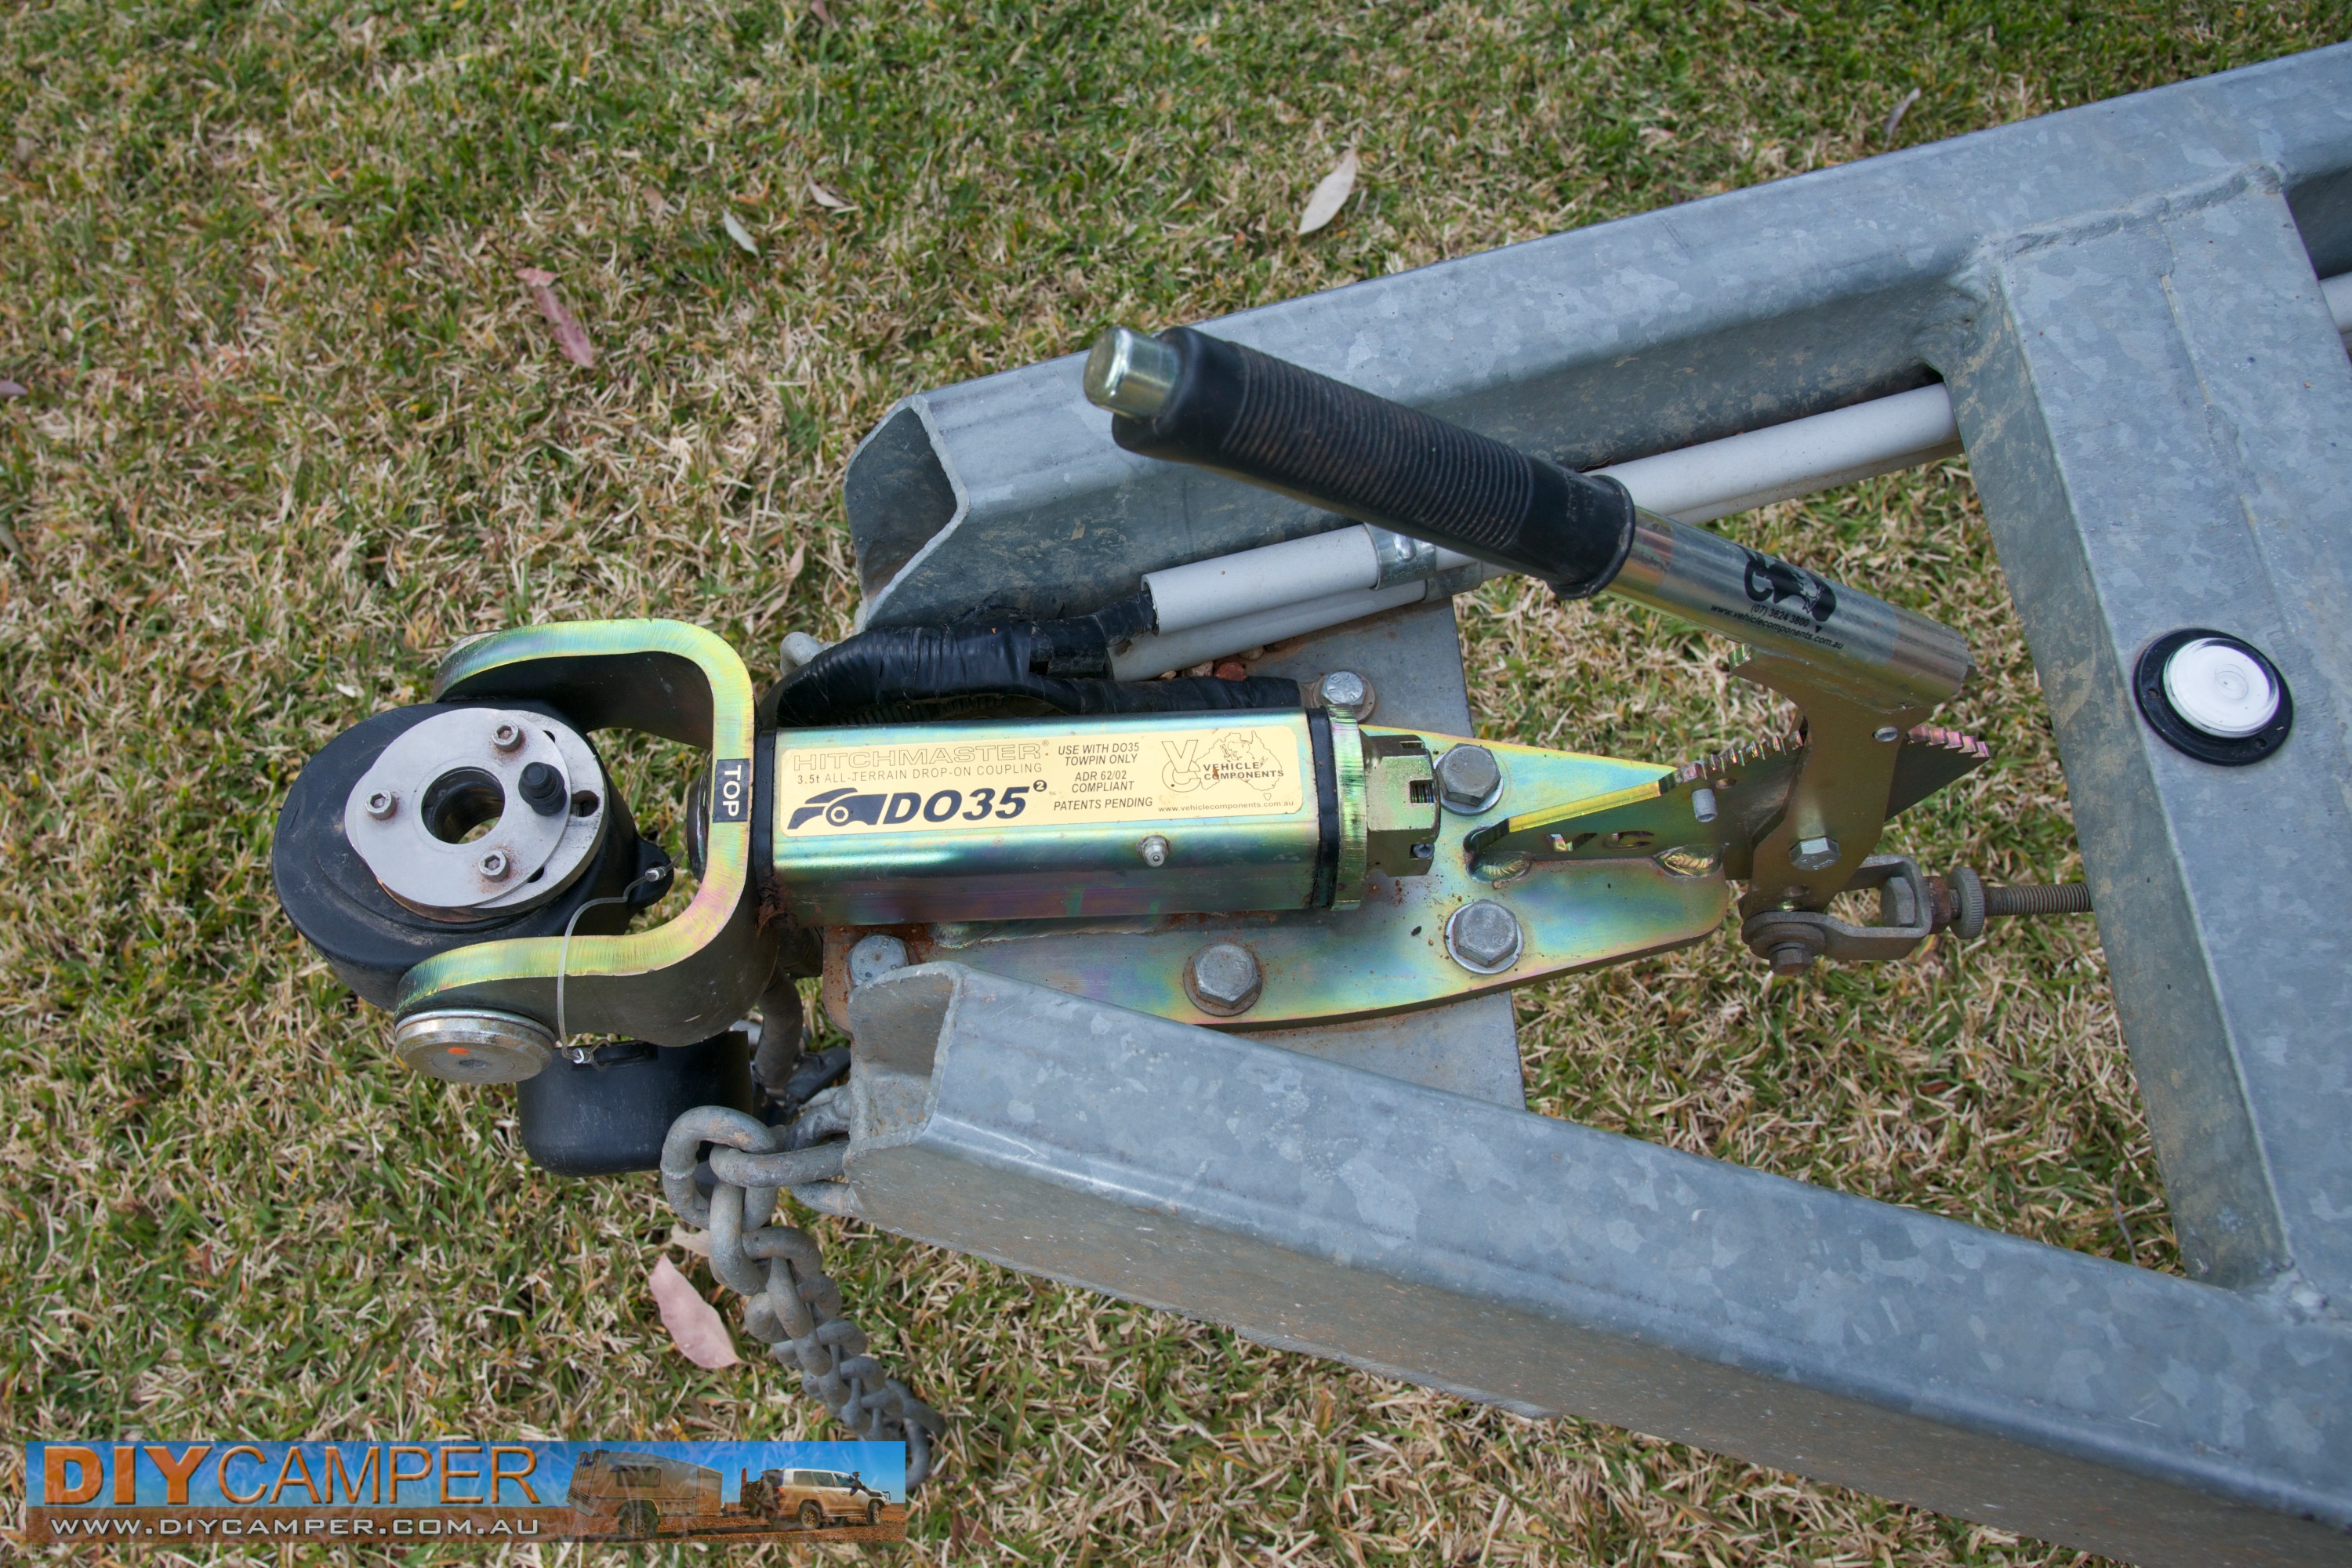
I don't recommend the use of a weld-on tow hitch. Using a bolt-on hitch allows for future changes. After initially using a (now discontinued) AT35 hitch, I recently changed to a DO35 coupling due to the superior drop-on connection system. You could also consider a Treg, Ozhitch or McHitch coupling, but do not use a standard towball hitch on an offroad trailer, as they do not offer sufficient articulation.

Looking for an offroad coupling at the lowest price? 

Comments / Q&A

comments

arrow If you found this page useful, please like or share on facebook!