Looking for trailer plans? ![]()
The overall design of your trailer (ie hard-roof/side fold/rear fold) will determine the options available for laying out the interior of your trailer.
Hard roof designs give the widest array of interior options, because you have full-size walls and a ceiling to work with. There's plenty of potential to add storage pockets, hooks or nets on the interior walls of the camper, and electrical systems such as power outlets and lighting can be permanently mounted. Side-fold designs are the most limiting, because there aren't really any interior surfaces which can be used for mounting lights, accessories etc. Rear-fold designs sit somewhere between the two, as you generally have lower-wall areas at the rear of the trailer which can be used to mount light switches and other accessories.
No matter what design you're planning for your trailer, ensure you check out commercial trailers of similar designs for useful ideas on layout. When you're designing your interior, remember that you'll be spending a lot of time inside the trailer, often in less than ideal conditions.
Try to include storage for important items such as clothing within the trailer (see the storage page for more information). Make sure you include provision for lighting and phone/accessory charging. You should install 12v power outlets (such as USB/cigarette lighter outlets), which are useful for charging phones, tablets, cameras etc, as well as running fans or even heaters. If you have 240v electricity in the trailer, then the interior should include 240v power outlets. You never know when a small fan heater may come in handy! Lastly, make sure you install a battery-operated smoke alarm, which is a legal requirement in most states of Australia.
Being a hard-roof design, my trailer offers penty of options for interior design. But 5 years down the track, there are a few changes I'd make to the original design/layout.
Materials
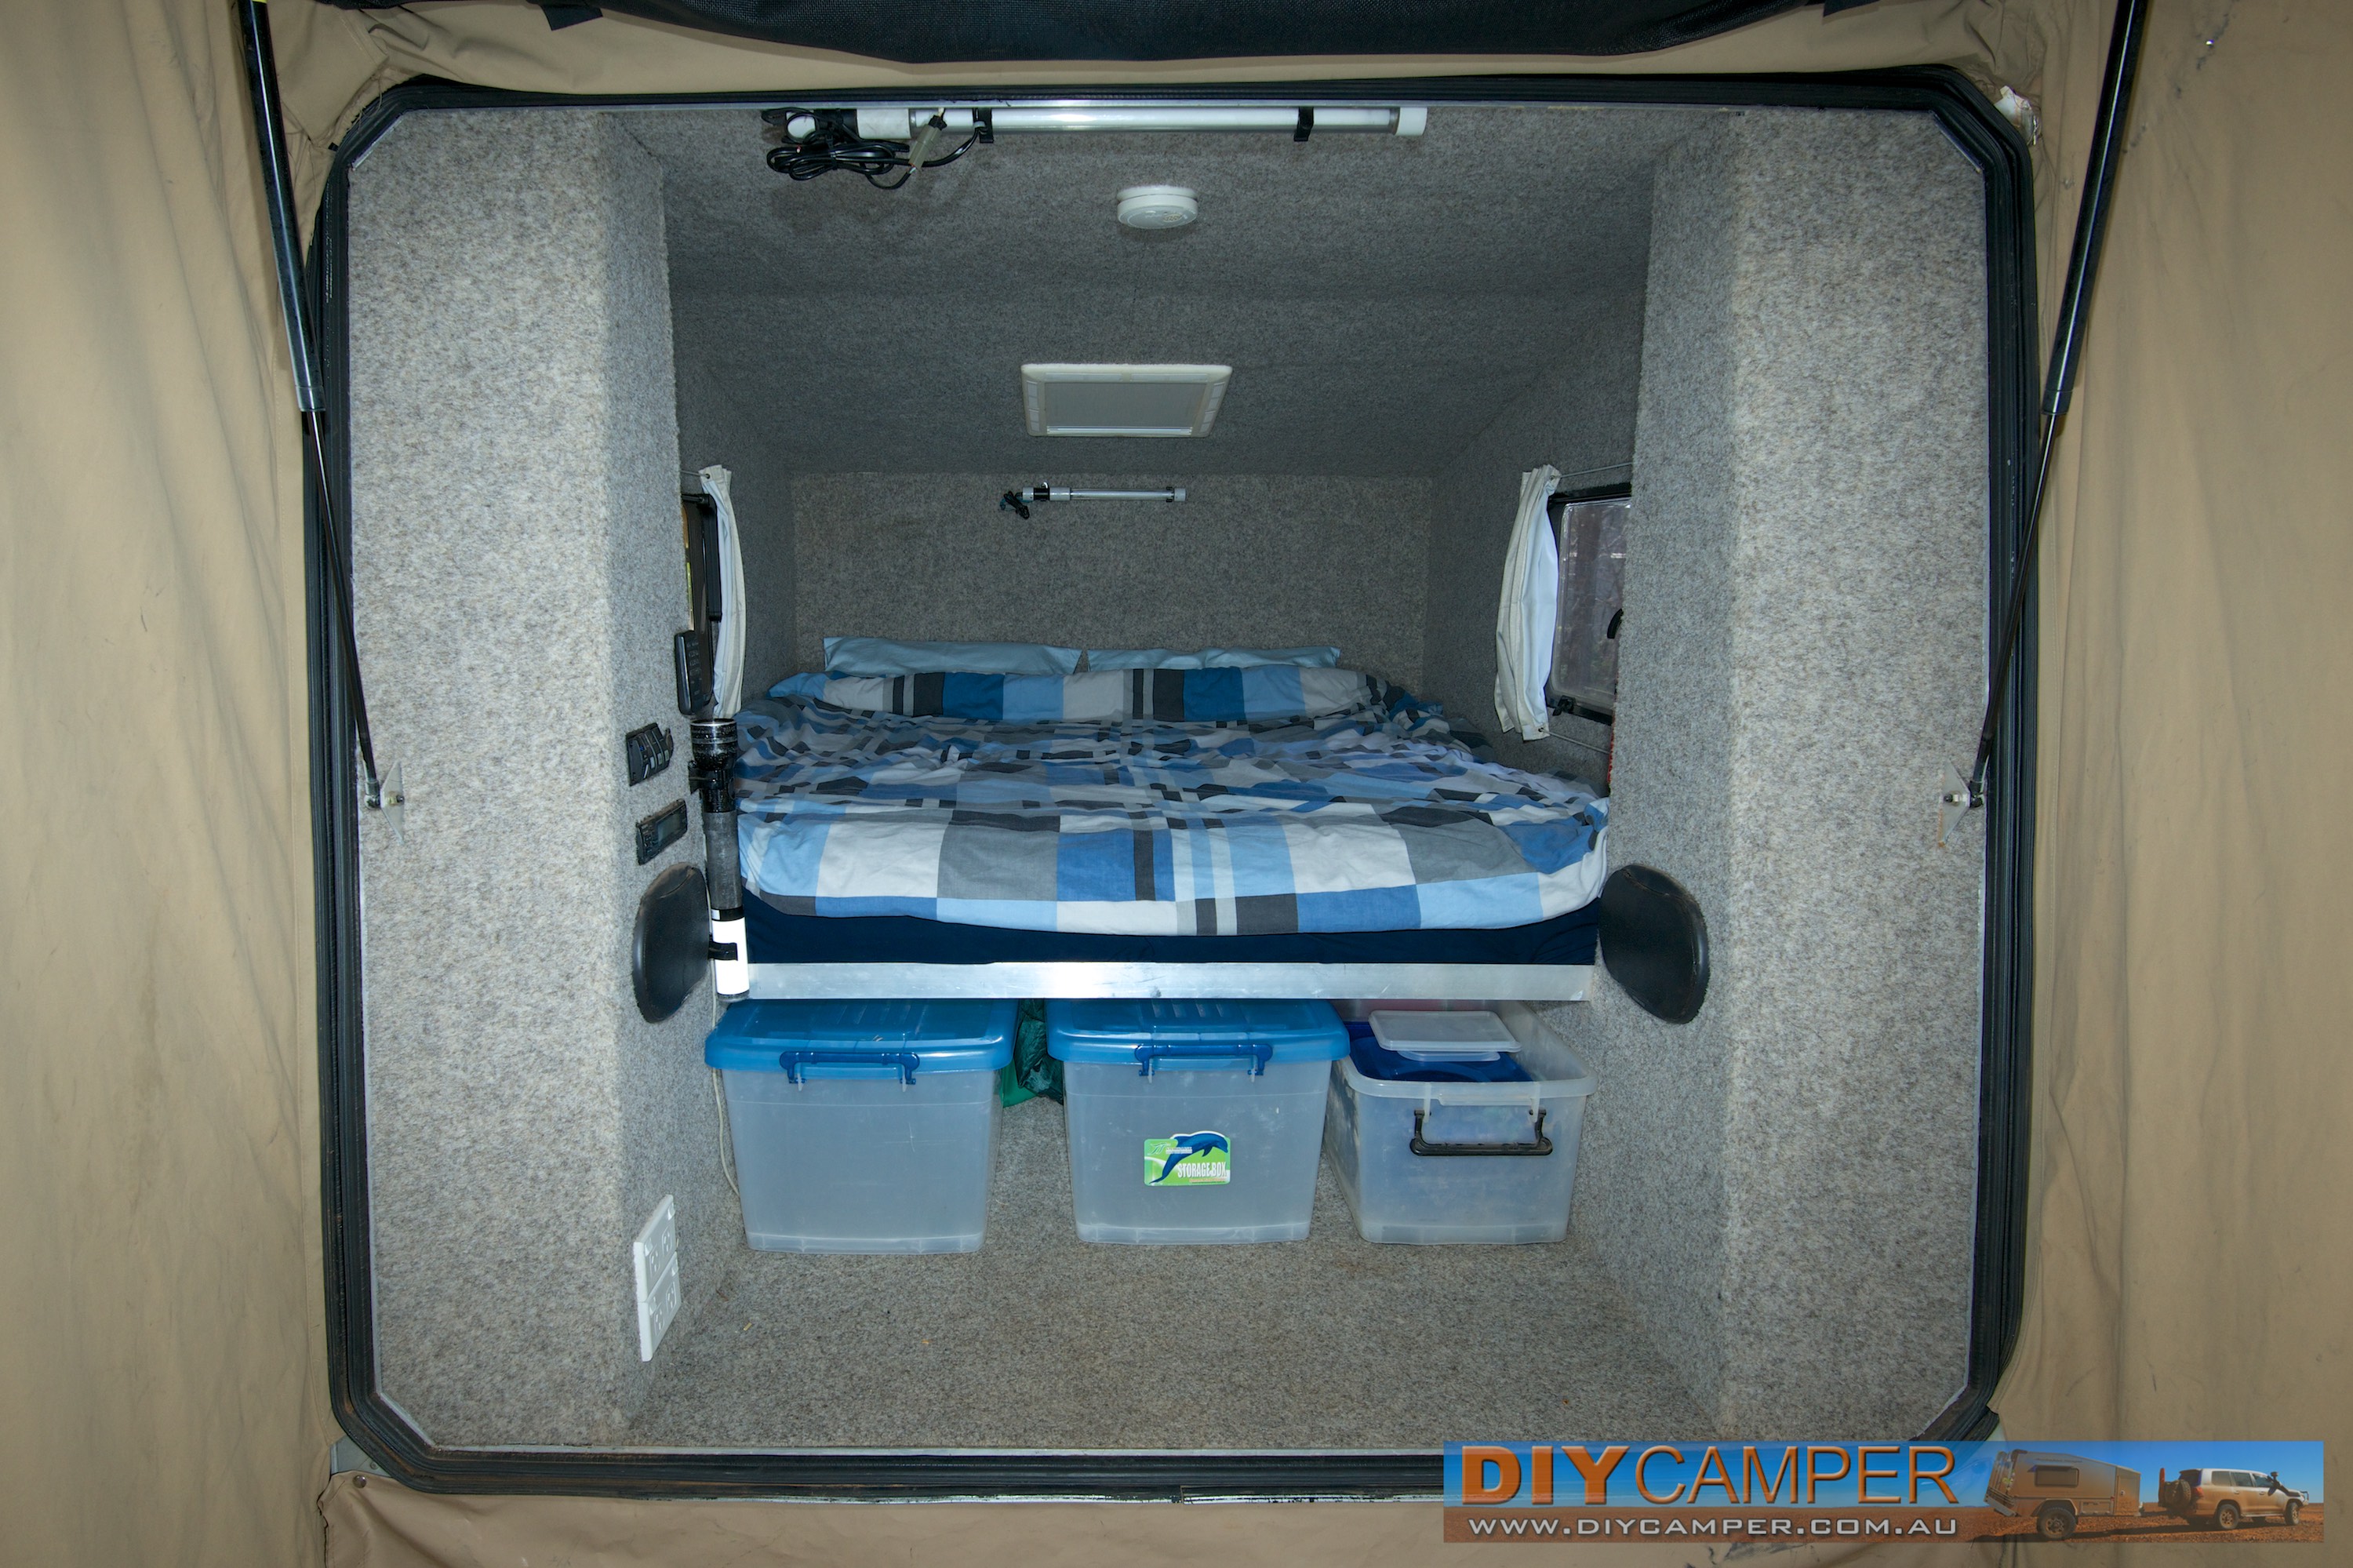
While the outside skin of the trailer is aluminium, I wanted to line it with something that would insulate the interior from noise and temperature. I ended up lining the walls and ceiling with 25mm polystyrene foam, glued to the outer skin using a water-based construction adhesive (eg Liquid Nails Fast). I then lined the walls, ceiling and floor with marine carpet
, again glued in place with the same adhesive. This has proven to be a very good choice. The main bed of the camper is very quiet, particularly if the front or side is facing the source of the noise (eg a highway). It also helps keep the interior warm in winter and cool in summer.
Bed
The main bed is slightly smaller than queen size. I used a high-density queen size foam mattress, and then cut about 200mm off the length so it would fit in the available space. Queen size bedding still fits, and the bed is long enough that I don't hang over the end. If you're particularly tall and you want to duplicate my trailer design, you'd have to extend the main body area by 200mm to fit in a full queen bed.
The bed sits on a piece of 12mm marine plywood, which is sitting on top of the wheel arches on the sides, and pieces of aluminium angle at the front and back of the bed. Underneath the bed is storage space, which is covered on the storage page.
Lighting and accessories
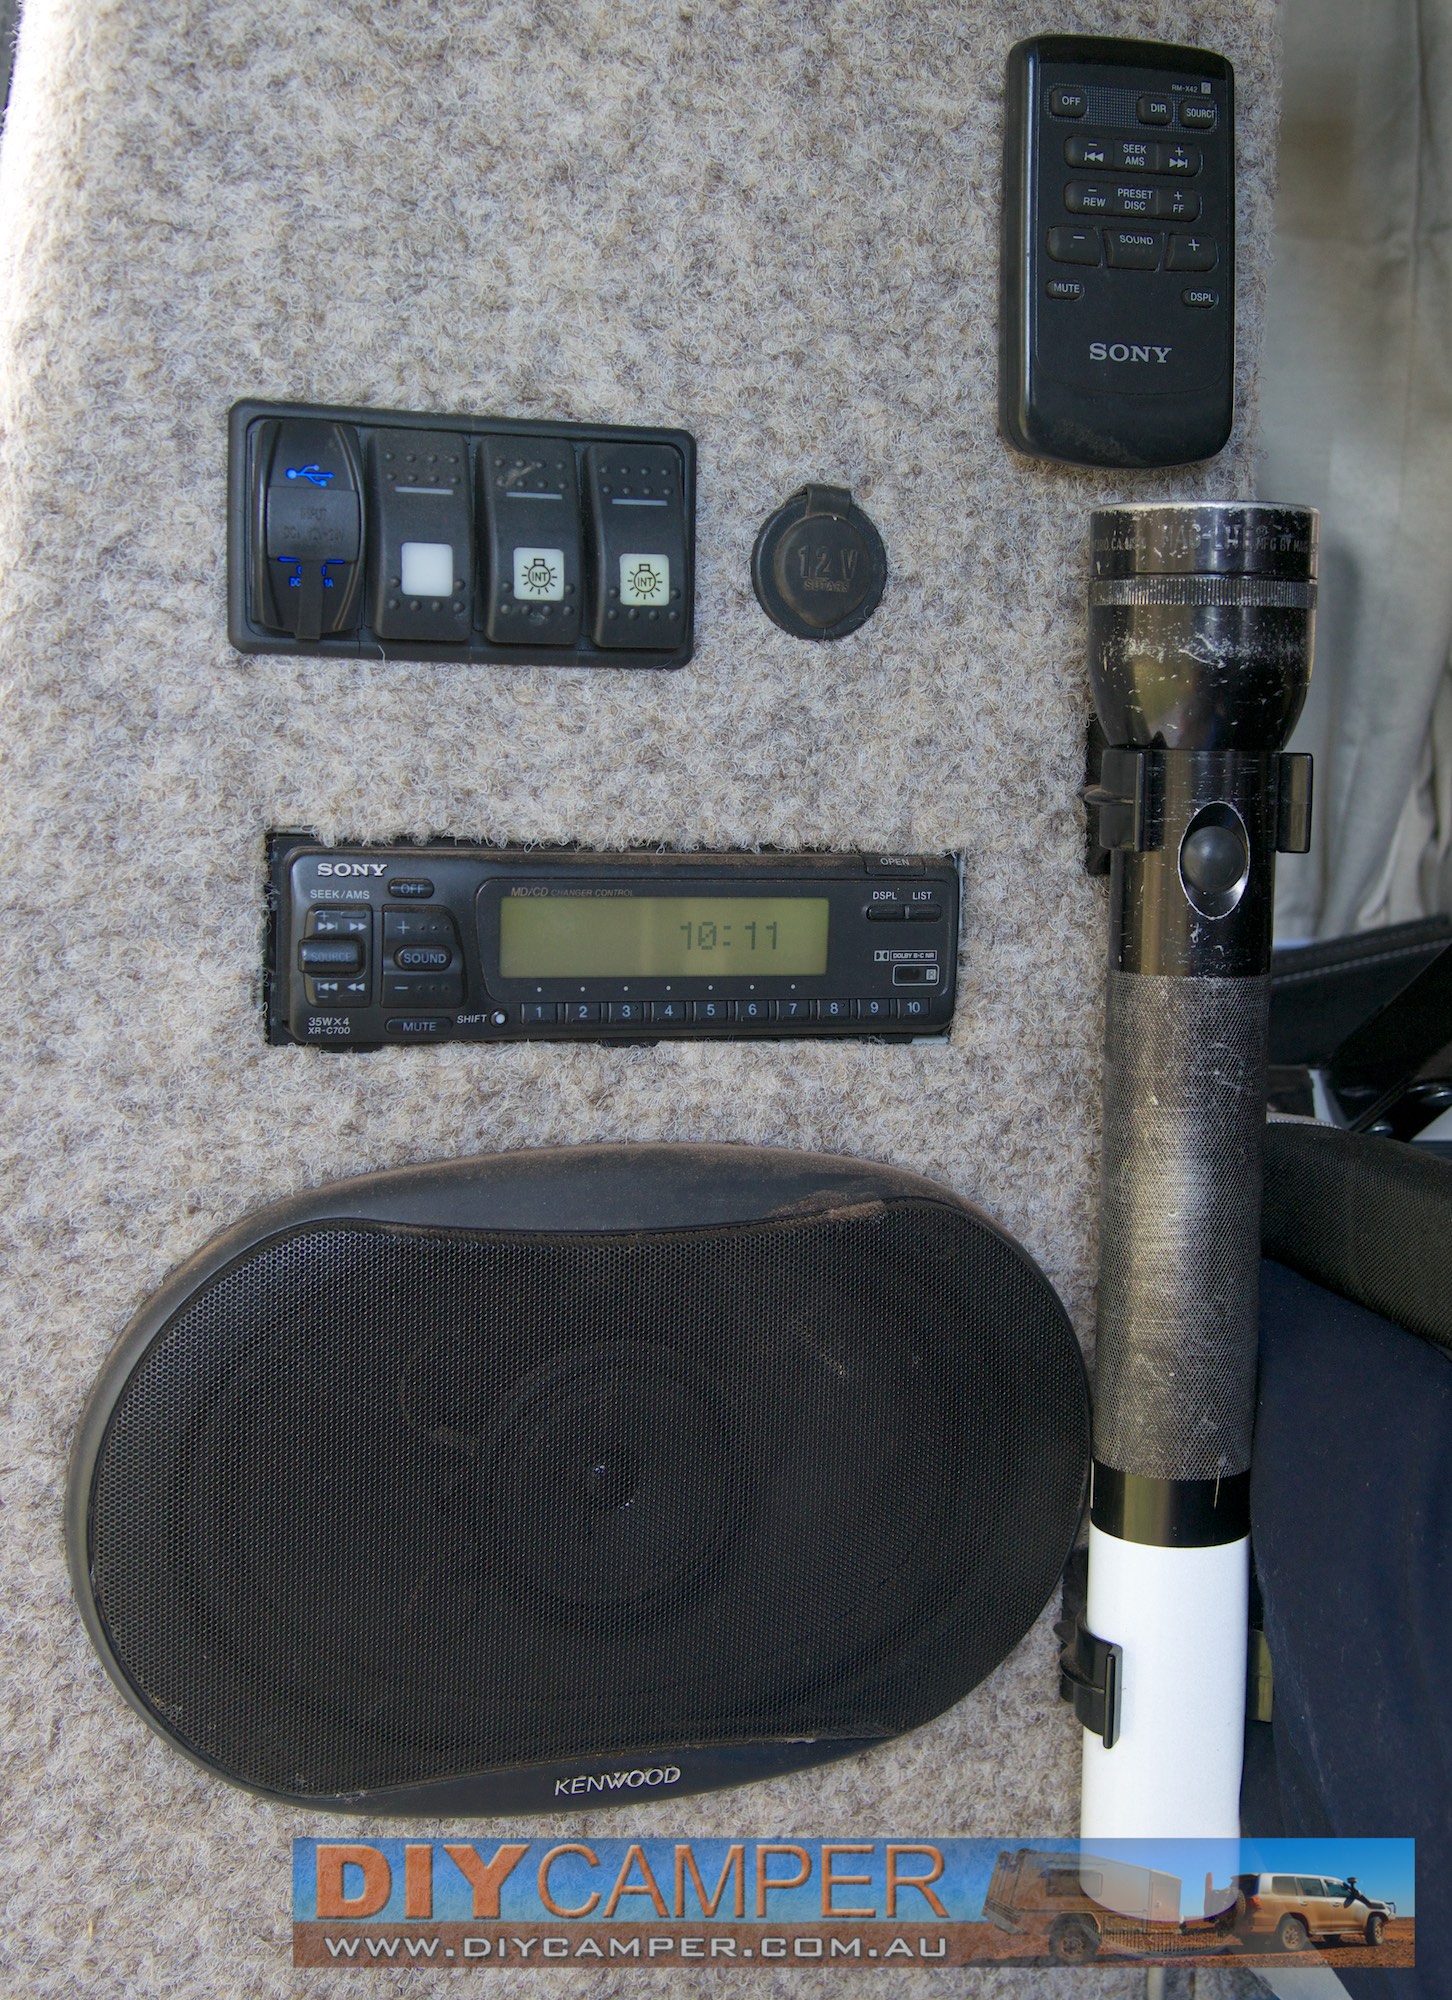
The main section of the trailer has 8w and 13w flouro lighting, with switches located on the pillars on the left-rear side of the trailer. In hindsight, it would have been better to have one of the lights switched from the front wall. There is also a battery powered smoke alarm on the ceiling.
Located with the light switches are twin USB power outlets (phone/iPad charging), a cigarette lighter outlet, a car stereo and a torch.
At the very base of the left pillar are four 240v power points, which I use for charging cameras, laptops etc, and also for running a small fan heater when power is available in cold climates.
The rear pillars are there to aid rigidity of the trailer, but (particularly on the right side) are generally hollow and a waste of space. I'm planning on making some cutouts in the pillars which will preserve their rigidity, but also provide some storage for small items, making better use of the space.


![]() If you found this page useful, please like or share on facebook!
If you found this page useful, please like or share on facebook!